
You know how it feels when you jump into something you’re truly excited about?
That was me with my blogging website. I had so many ideas and couldn’t wait to get started. But soon, I realized passion alone wasn’t enough. Content deadlines slipped, the organization was nonexistent, and everything felt like chaos.
I knew I had to change my approach. Then, I stumbled upon something that changed everything: website project management.
Now, I’m here to show you exactly how I turned it all around.
Ready to dive in?
What is Website Project Management? From Disorder to Success
After hitting a wall, I knew something had to change. So, I dove deep into research to figure out what went wrong with my website project.
I found out that my technical and marketing strategies were solid, but only my project management wasn’t.
Note: This isn’t just because I’m working on my own website—it’s the same scenario when you’re juggling multiple projects for clients or agency work.
Then I learned, ‘what is website project management’.
There is a process of planning, building, and monitoring a website, which is called website project management.
In simple words, website project management is a structured approach that covers everything from planning out the initial idea to building the site and ensuring it all runs smoothly.
Instead of just diving in, you’re following a roadmap to make sure the website meets its goals and works as it should.
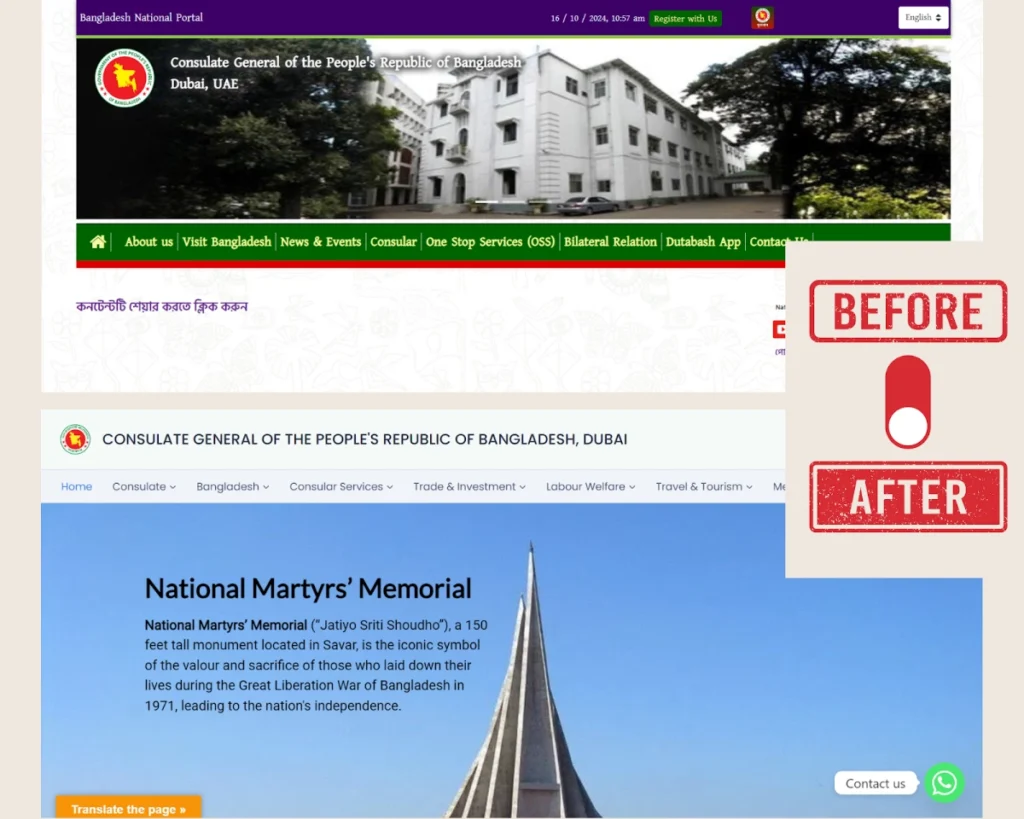
Back then, I wasn’t ready to hire a project manager, so I decided to take a DIY approach and build my own strategy.
First, I started by implementing a project management methodology that gave me a bird’s-eye view of my tasks and allowed me to track my progress.
From there, I organized the essential project phases, making prioritizing and planning easier. And creating a step-by-step roadmap took me from a state of chaos to a place of clarity.
To keep everything on track, I started using project management software that streamlined my work into one easy-to-navigate space—no more juggling tabs or losing track.
With every step forward, I learned something new. Each mistake I made turned into a lesson, and these lessons have become the foundation of my best tips for effective website project management.
Now, I’m here to share them with you.
5 Website Project Management Methodologies and My Pick
Here’s where I started: picking a methodology. With so many options out there, it took me a week of sifting through different approaches to find one that fit. But no need for you to go through that same hassle!
I’ve outlined 5 solid methodologies designed for website project management, each ready to guide your journey forward.
Take your pick—any of these will set you on the right path.
1. Waterfall
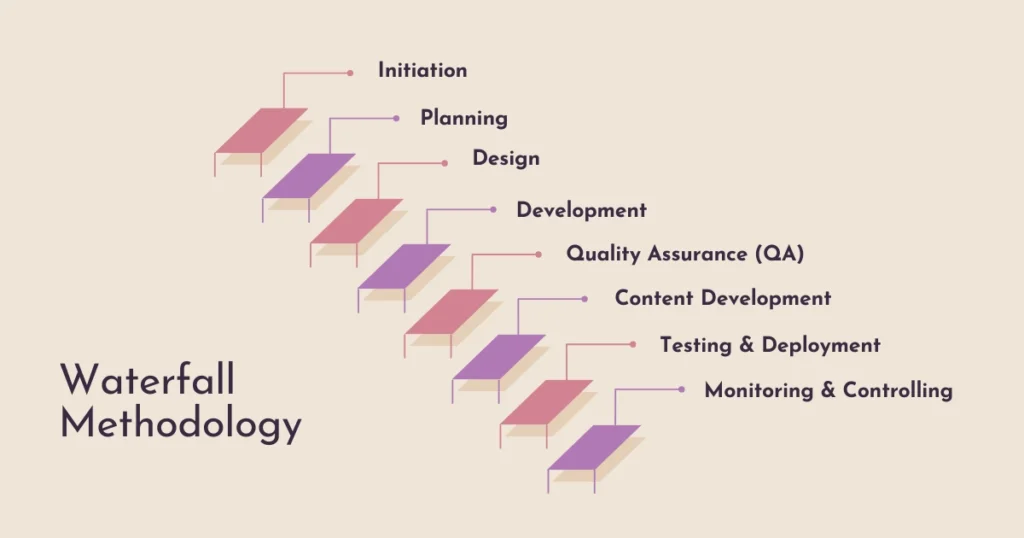
What is Waterfall methodology: The Waterfall methodology is a structured project management approach where tasks are completed in a set, sequential order.
It begins with gathering all requirements upfront, followed by distinct phases. Each phase must be fully completed before moving on to the next, as there is no going back to a previous phase once it’s done.
We will talk about the phases later in this blog.
When to Apply Waterfall Methodology: This method is ideal for projects with clear objectives, stable requirements, and minimal change.
It’s particularly suited for teams or industries that value detailed planning and documentation, such as construction, manufacturing, and software development, where changes are costly and time-consuming.
Why It Is Not My Pick: However, I decided not to use Waterfall for my project because my website needed more flexibility. The iterative nature of my work required constant adjustments, especially as I refined content and features based on feedback.
Waterfall’s rigid structure didn’t offer the adaptability I needed to make quick changes throughout the project, so I chose a more flexible approach instead.
2. Agile
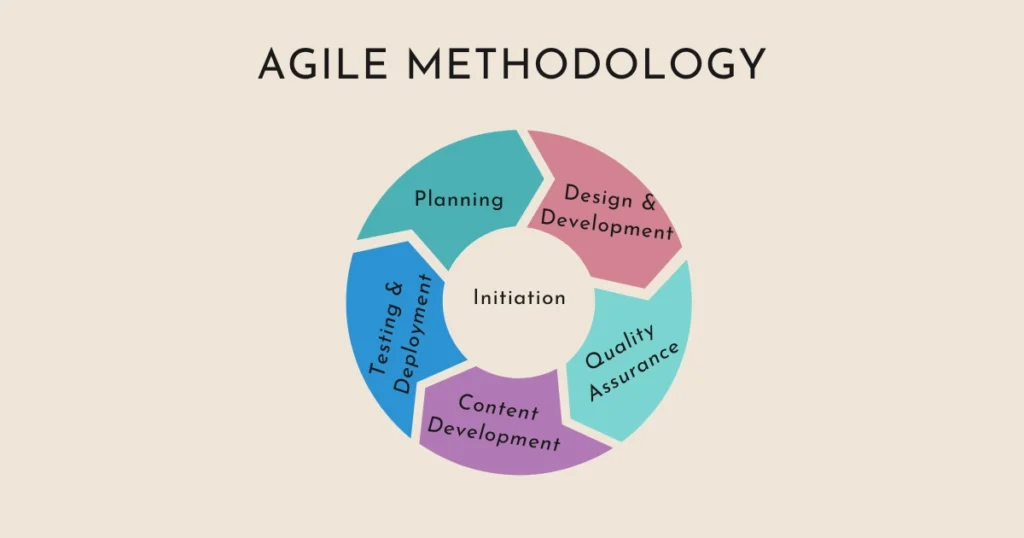
What is Agile methodology: The Agile methodology is a flexible, iterative approach to project management that prioritizes continuous improvement and customer feedback.
Unlike the linear Waterfall model, Agile breaks projects into smaller cycles, called sprints, which usually last from 1 to 4 weeks. Each sprint focuses on completing specific tasks, followed by a review and refinement stage.
When to Apply Agile Methodology: Agile is all about staying flexible and making adjustments as you go. Instead of planning everything up front, you work in short cycles, check progress often, and make changes based on feedback.
It’s ideal for projects that need adaptability—like website builds—where you’re constantly tweaking content or design. Agile helps keep things moving smoothly, so this method is a great choice if you prefer to adapt and refine along the way!
Why It Is Not My Pick: I didn’t choose Agile because it’s heavily iterative, which didn’t fit my website’s needs. My project required a stable, simple approach, and Agile’s constant re-evaluation cycles could have led to endless revisions.
While Agile is great for adapting to change, I needed something more predictable to efficiently get my website from start to finish.
3. Scrum
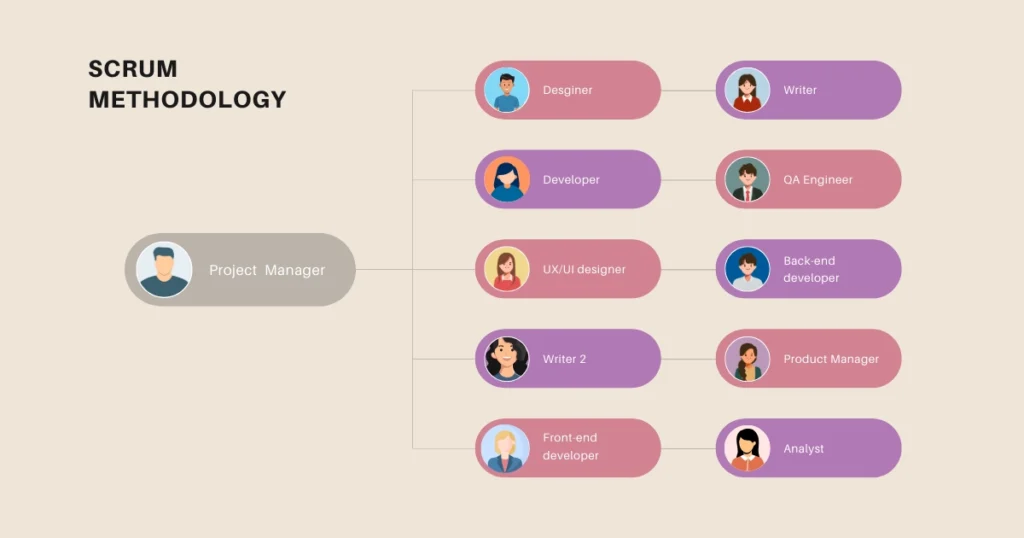
What is Scrum methodology: Scrum is more like an Agile project management approach that organizes tasks into short, focused sprint cycles. These sprints usually last between 1 to 4 weeks. During each sprint, the team follows a structured routine, with daily check-ins called Daily Scrums.
A Scrum Master guides the team, ensuring each sprint moves smoothly by removing roadblocks and promoting collaboration. At the end of each sprint, the team reviews results and plans for the next cycle. It’s a great fit for teams that thrive on collaboration and adapt quickly to change.
When to Apply Scrum Methodology: Scrum is ideal for projects where requirements change frequently, and the team benefits from regular feedback. It’s beneficial for complex projects that must be broken down into manageable tasks and teams that need strict time-boxed periods for focus.
If your project requires continuous improvement and frequent re-evaluation, Scrum can help maintain progress and deliver consistent value with each sprint.
Why It Is Not My Pick: I started with the Scrum methodology, but the daily oversight felt a bit excessive for my project. Since my website didn’t require constant monitoring, the repeated check-ins led to a loss of focus. Hearing similar updates day after day became a bit redundant as tasks stretched over several days.
While Scrum is flexible, that level of daily engagement wasn’t necessary for my simple project, making it feel more overwhelming than helpful.
4. Kanban
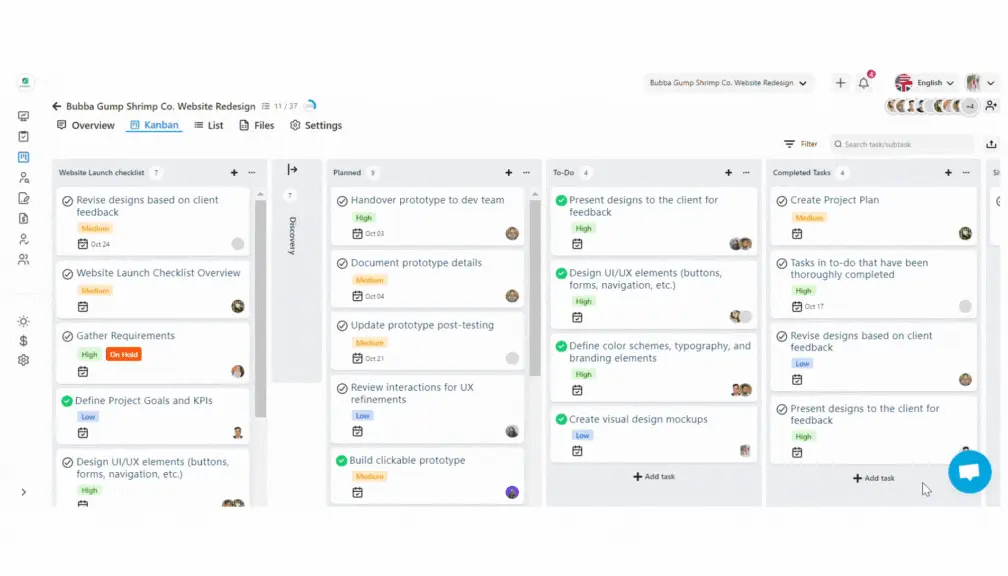
What is Kanban methodology: Kanban is a visual project management method focusing on continuous delivery and incremental improvements.
It uses a Kanban board to represent different stages of a project, with tasks displayed as cards that move through columns like “In Progress,” “On Hold,” and “Completed.” This approach helps teams visualize their workflow and identify any bottlenecks, ensuring smooth progress from one stage to the next.
When to Apply Kanban Methodology: Consider using Kanban when you want a clear visual representation of your project’s status. It’s ideal if you need quick updates at a glance and want to manage tasks efficiently with Work in Progress (WIP) limits.
This methodology works well for projects with changing requirements, such as ongoing website support or services.
Why It Is My Pick: Yes, Kanban is my pick. I chose Kanban for my project because it offers a simple way to visualize progress. The flexibility of moving tasks across columns keeps my team focused and productive.
Plus, the ability to set WIP limits prevents overwhelm, allowing us to tackle a manageable number of tasks at once. That too becomes more accessible with the OneSuite Kanban view.
Overall, Kanban’s visual nature makes it easier to keep track of where we stand, which is crucial for maintaining momentum in our website project.
5. Critical Path
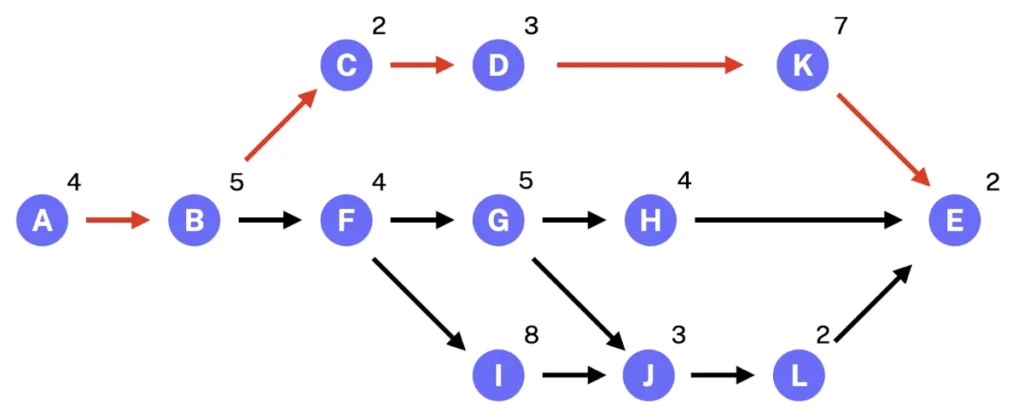
What is Critical Path Methodology: The Critical Path method is a project management approach that helps identify the most prioritized tasks to meet deadlines.
By mapping out all the essential tasks and their dependencies, project managers can determine the longest sequence of tasks and the critical path, ultimately affecting the project’s timeline.
When to Apply Critical Path Methodology: This method is particularly useful for large, complex projects with many interdependent tasks. If you need a visual representation of task sequences to optimize resource allocation and keep everything on track, the Critical Path methodology could be the right fit.
Why It Is Not My Pick: I decided to not go with the Critical Path method because my project isn’t overly complex.
While it clearly visualizes task dependencies, my website build doesn’t require such detailed oversight. I found a simpler approach that was sufficient for my needs, allowing me to focus on delivering results without getting bogged down in intricate planning.
So far, I believe you have got your pick. It is better to mention that there is no need to pick mine here, as not all projects are the same. Pick what suits your project size, complexity, and demand.
⚡️Read Also: 10 Project Management Knowledge Areas
9 Key Phases in Website Project Management
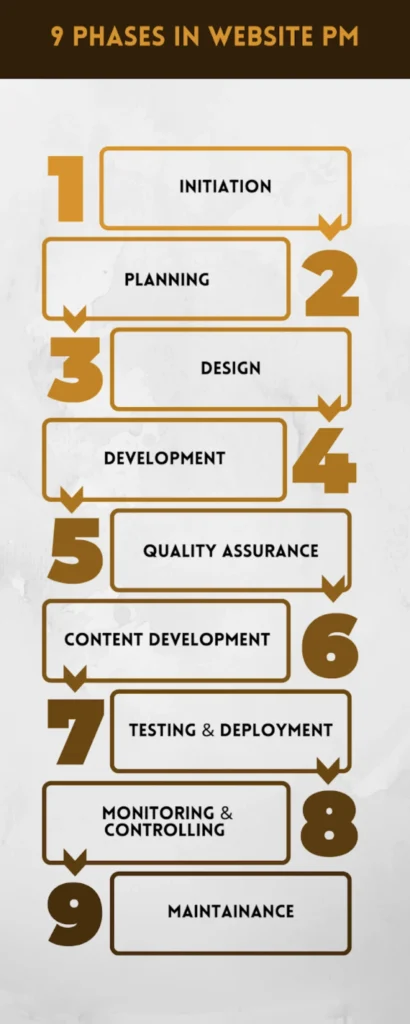
After picking the right methodology, I paid attention to the phases of my website development project. It helps me navigate beyond a one-size-fits-all flow because, sometimes, the standard route isn’t the best fit.
Here’s my tried-and-true approach that’s worked wonders for me, and I’m sure it’ll be helpful for you, too!
1. Initiation
Start with the Initiation phase, where your website project takes shape.
This phase is crucial because it’s where you define what you want your website to achieve. You’ll outline the scope, objectives, and key players involved.
One of my favorite parts is creating a vision board—it really sparks creativity!
And don’t forget to set SMART goals (specific, measurable, achievable, relevant, and time-bound) to keep your project on track. With these elements, you’re setting a strong foundation for success!
2. Planning
Next is the planning phase, where we focus on the specifics and assemble our project’s piece. I’ve seen that a well-organized plan is the key to success. Consider this your project roadmap.
Start by outlining all the details: what tasks need to be done, timelines, and resources required. You might find yourself asking, “What essential features do we want? Do we need e-commerce functionality? How about a search option?”
Getting input from clients on their goals, budgets, and preferred features is key. This way, you can create a realistic timeline and cost estimate. And remember to include a little buffer in your budget for any surprises that might pop up.
By the end of this phase, you’ll have a robust blueprint ready to guide you. In my experience, this phase is very important for keeping everything on track. The more detailed you are, the smoother the rest of the project will flow!
3. Design
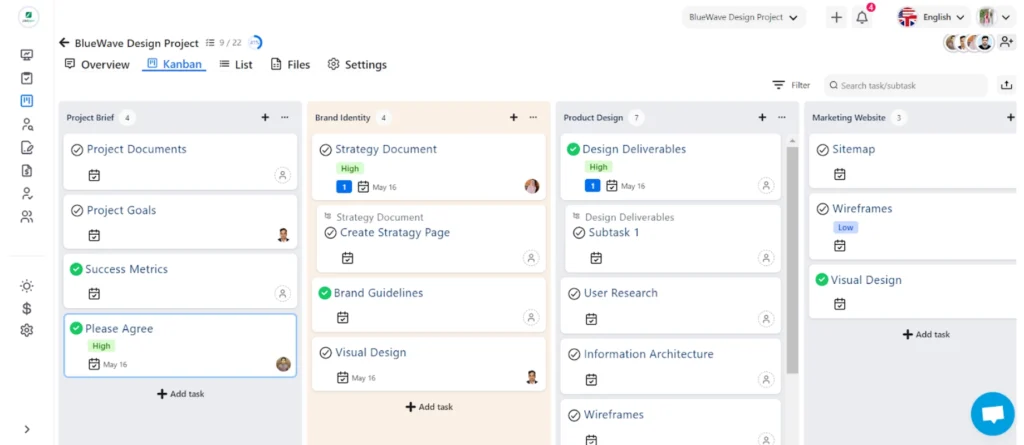
Now, we’re at the Design phase—where all that planning turns into visual!
First, we sketch out the website layout using sitemaps and wireframes. Seeing the site’s structure in a wireframe can feel like a sneak peek at the final look and feel. At this stage, you’re building the foundation that shows how users will navigate the site, so test and tweak if something seems off.
Then, it’s on to design and content. Here, the design team crafts visuals—like images and icons—while the writers create copy that fits your brand’s voice. Keeping communication steady throughout this process is crucial to avoid hiccups and keep everyone on the same page!
4. Development
Once the design is locked in, the developers get to work building the site from the ground up.
Front-end development makes the visuals real, ensuring that all layouts, buttons, and interactive elements work seamlessly for users. Meanwhile, the back-end is set up, handling the behind-the-scenes magic that makes the site function smoothly.
The dev team keeps communication flowing, ensuring everything aligns with the vision and that any changes are implemented efficiently.
By the end, you have a fully functional site ready for testing and tweaks!
5. Quality Assurance
Next up is the Quality Assurance (QA) phase, where we ensure everything works exactly as planned.
If you’ve ever been deep in a project, you know how easy it is for little bugs and quirks to sneak through. QA is about finding and fixing those issues, whether a broken link or a performance hiccup.
A solid QA process for each site includes testing for functionality, performance, security, and usability. It’s all about ensuring quick load times, smooth functionality, and top-notch security.
And if this site is for a client, running regular tests is a must. It keeps everything running smoothly, ensuring the site offers a great experience every time!
6. Content Development
The Content Development phase is where your website starts to come alive. With wireframes and visuals mapped out, it’s time to add the words and images that bring personality and purpose to each section.
I start by ensuring every section aligns with the brand’s tone—this helps set the right vibe from the get-go.
Visuals are next! Engaging images, clear icons, and clickable buttons make the site visually appealing, especially on mobile. Then, it’s on to the copy. This is like piecing together a puzzle, crafting text that grabs attention and guides users to take action.
Don’t forget to weave in SEO here! Using keywords strategically can boost your site’s search ranking, helping users find you more easily.
💡Read also: 5 Best Marketing Automation Software for Agencies
7. Testing and Deployment
The Testing and Deployment phase is where all your hard work finally comes to life!
Setting up a testing checklist is essential; it helps catch bugs, whether it’s broken links, compatibility issues, security gaps, or slow page loads. Using tools to track bugs makes it so much easier to tackle them one by one.
Once testing wraps up, it’s time to deploy! You’ll upload the site to its domain, connect to a CMS (Content Management System), and register with Google Search Console for quick indexing. And then—it’s go-time! You hit publish, and your website is live for the world to see.
After launch, watch the performance and be ready to fix any last-minute snags.
8. Monitoring and Controlling
In the Monitoring and Controlling phase, keep a close eye on your website’s progress to ensure it aligns with your goals.
Regular check-ins with your team are essential to stay on track, and using tools to monitor user interactions helps you catch any issues early on.
If you notice any slow load times, tweak and optimize for faster performance. Review the site’s progress regularly and make adjustments as needed—quick fixes help keep things running smoothly and ensure your website continues to deliver a great experience for visitors.
9. Maintenance
In the Maintenance phase, keeping your website running smoothly is the priority. This means regular check-ups for updates, security patches, and performance tweaks to prevent potential issues.
Think of it as ongoing care, like routine maintenance for a car. Also, define the support you’ll provide—fixing bugs or making small adjustments. Clear boundaries in your maintenance plan help ensure everyone’s on the same page so you and your client can enjoy a functional, reliable site built to last.
This set of phases helped me to rescue my website project from the chaos and move to clarity.
How to Plan Website Projects Management—Step-by-Step Guide
After setting all the other factors in website project management, I zeroed back on planning.
In this stage of my website project management, I made the best decision I have ever taken—choosing project management software to speed up the process and reduce the workload.
While 44% of project managers still believe in manual management, a 2022 study showed that 77% rely on and prefer project management software.
So, why not?
Moreover, using project management software lets me manage multiple projects simultaneously. I didn’t even need to hire a project manager!
Imagine how much I saved… 😉
Define Project Goals and Scope
The first step to successful website project management is setting clear goals and defining the project scope. Start by identifying what you want the website to achieve.
For me, this was crucial to avoid repeating my initial mistakes. Reflect on questions like:
- What problem is your website solving?
- Who’s the target audience?
- What features are essential?
- How will you measure its success?
Clearly defining these aspects will prevent scope creep, keep your team aligned, and ensure you’re focused on delivering the right results.
Manage Your Budget
Managing the budget effectively is a vital part of website project management, as I learned from my experience.
First, establish a realistic budget covering all essential aspects, like design, development, and testing, while leaving a bit of a buffer for unforeseen costs. It’s wise to track expenses closely and stay aware of how scope changes impact costs.
The right tool can help monitor spending and align the entire team. Regular budget updates ensure you’re on track and help prevent surprises.
Use a Project Management Tool
Using a project management tool can be a game changer for website projects. When I finally adopted an all-in-one platform, it transformed my workflow.
A project management tool helps manage tasks, track progress, and enhance team collaboration—all in one place. It offers a centralized hub for all project-related information, making it easier to stay organized and focused.
Before choosing a tool, it’s essential to research and select one that aligns with your specific needs. With the right project management software, you’ll streamline processes and gain valuable insights, making your projects run much more smoothly.
Develop a Project Timeline
Creating a project timeline is important for keeping your website project on track. Start by establishing a clear start and finish date and deadlines for key milestones and deliverables.
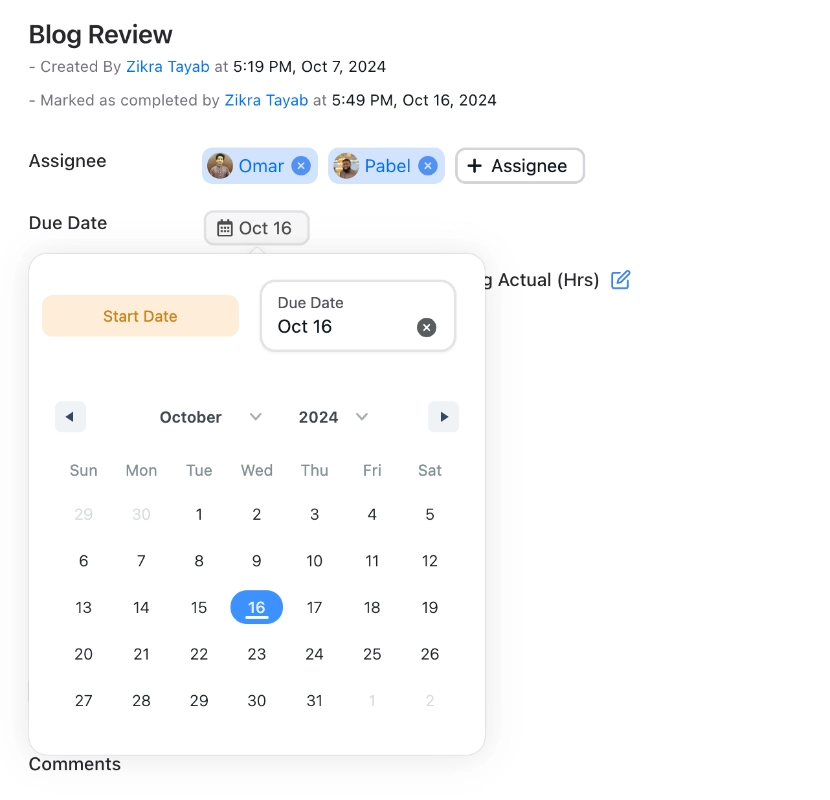
It’s essential to be realistic about how long each phase will take. Web development often hits snags, so giving yourself extra time is wise. Communicate with your team and stakeholders about potential delays, and aim for conservative estimates.
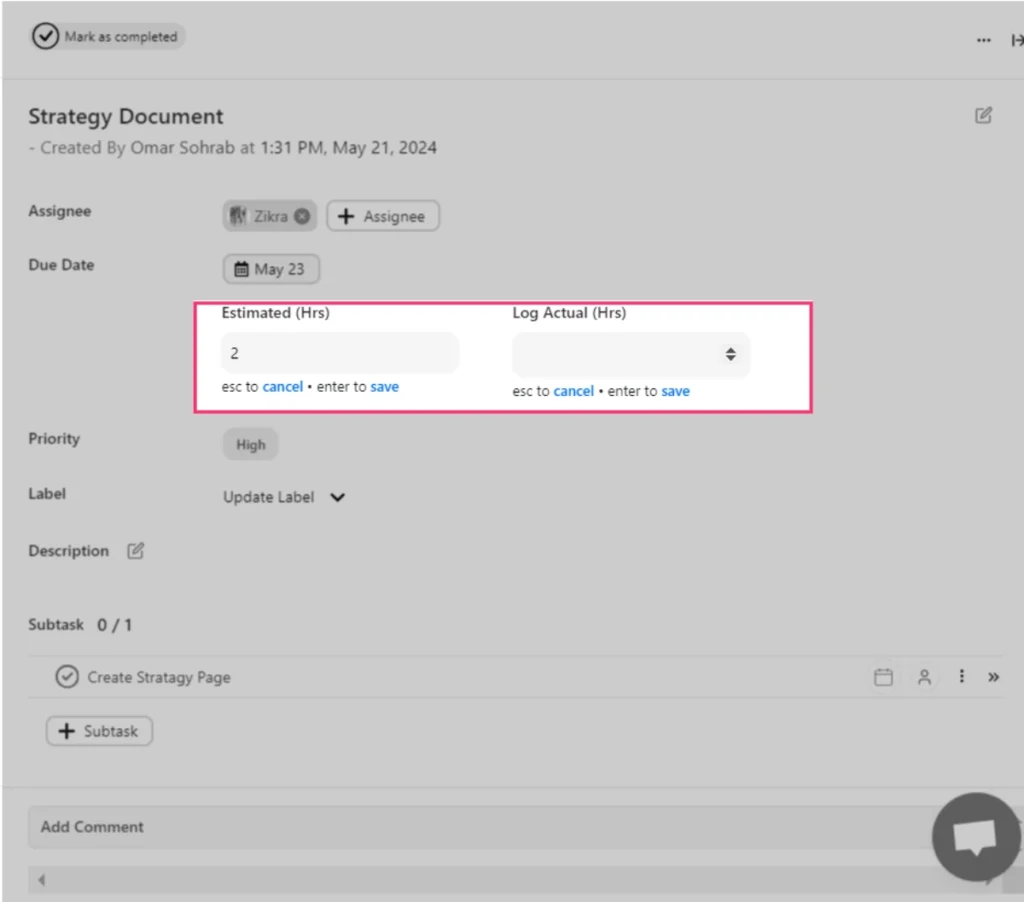
This way, you can manage expectations and avoid the pitfalls of overpromising while ensuring timely delivery.
Assign Roles and Responsibilities
To ensure a smooth project flow:
- Start by assembling a team with the right mix of skills.
- Assign each member specific roles that align with their expertise and strengths.
- Outline responsibilities so that everyone knows exactly what they’re accountable for.
This approach helps maintain balance in the workload, promotes collaboration, and minimizes confusion. When everyone understands their role in the bigger picture, it’s easier to foster teamwork, stay organized, and make sure tasks are completed effectively and on time.
Communicate Effectively
Establish a clear and consistent communication plan to keep your project running smoothly. Define preferred channels—like email, messaging apps, or project management tools—and set expectations for updates. Frequent check-ins and shared updates help everyone stay aligned on goals, reducing misunderstandings.
A centralized project management platform can streamline this process, providing a space for real-time updates, collaborative discussions, and progress tracking.
This ensures everyone, from internal teams to external stakeholders, is on the same page, promoting transparency and making it easy to resolve issues quickly.
Begin Website Design & Development
With your project requirements in place, it’s time to turn your vision into reality. Start by developing the website structure through wireframes and sitemaps, giving you a visual overview of layout and functionality.
Collaborate with designers to create engaging visuals that align with your brand identity. At the same time, developers bring these elements to life, coding both the front-end and back-end. Regularly test the design to ensure functionality, making adjustments as needed.
Use project management tools to track tasks, manage timelines, and keep communication flowing between all teams.
Conduct Beta Testing
This phase thoroughly tests the website’s functionality, security, and overall performance.
Start with moving the site to a staging environment, where you can simulate real-world usage without affecting the live version. Develop a detailed testing plan and conduct link tests, cross-browser checks, speed tests, and security scans.
Use bug-tracking tools like Bugzilla, jira etc. to document issues, prioritizing critical bugs over minor fixes.
Additionally, user testing, such as A/B tests or usability studies, should be considered to gather feedback, optimize design, and make final improvements before launch.
Top 5 Website Project Management Tools for Success
To keep your website project on track, a project management dashboard is key—and project management software can make the whole process faster and smoother.
I saw this firsthand when I chose OneSuite; it fits my needs perfectly and made managing my website project much easier.
I’ve compiled a list of the top 5 project management tools for website projects. Pick one, and you’ll thank me later for making your project simpler and more organized!
OneSuite
Pricing
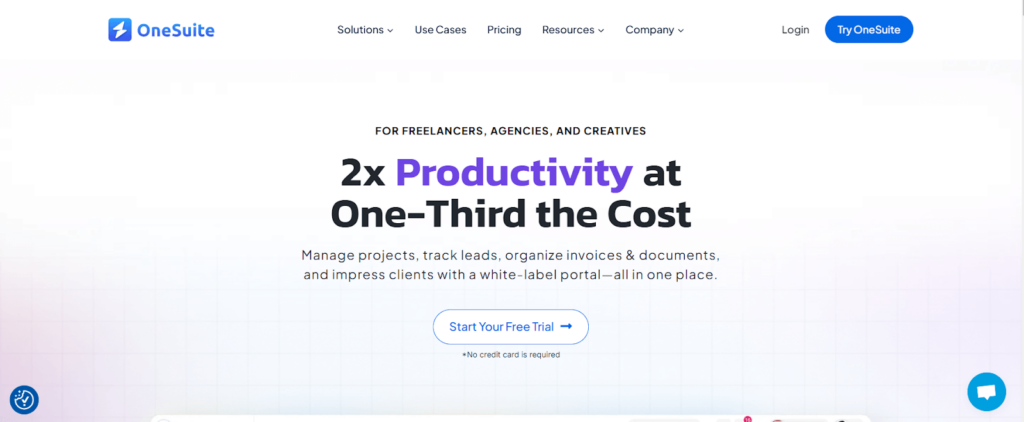
The pricing plan of onesuite starts from $29 to $239.
Overview
OneSuite is a project management tool that streamlines workflows and enhances team communication. It supports better collaboration, helps teams stay organized, and ensures client satisfaction.
With tools for effective task management and cross-departmental teamwork, OneSuite simplifies your process, making it easier to focus on what matters. Keeping everything in one place will save time and improve efficiency, letting you finish projects faster and with more control over your workflow.
Features
The features of OneSuite are—
- Allows to manage all business in one place with enhanced focus, efficiency boost, and cost-efficient.
- Simple leads pipeline to manage list effectively.
- Integration facilities with project management to increase productivity, enhanced collaboration and satisfy clients.
- They follow a centralized agreement hub to streamlined workflow, improved client experience, and increase security.
- Have an organized client portal for effective collaboration that increases transparency, enhanced collaboration and builds trust and satisfaction towards your brand.
Trello
Pricing
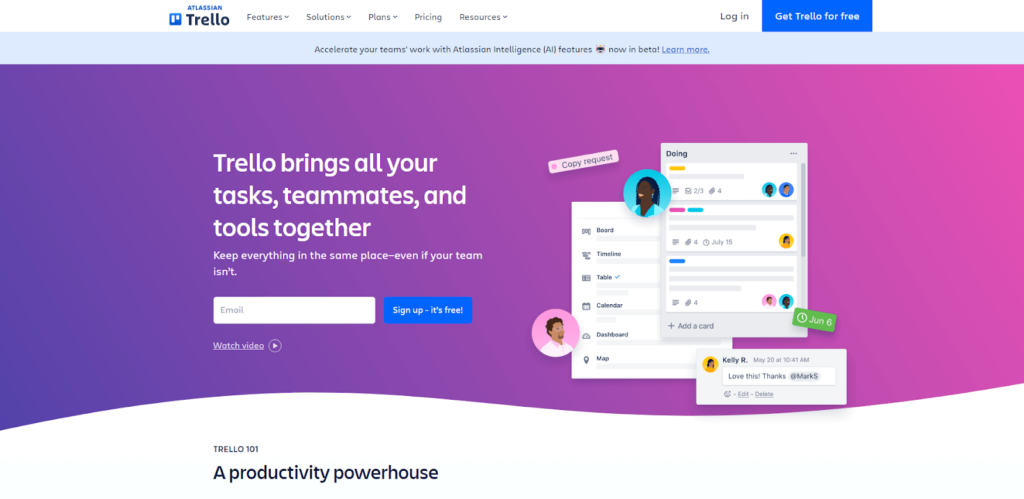
The pricing plan of Trello starts from free which is at 0$ and follows the Standard, Premium and Enterprise. These plans are at 5$, 10$ and 17.50$ respectively.
Overview
With the Kanban-style interface, Trello makes project management simple and efficient. A Trello board lets you be an organizer, helping you keep everything in order and moving smoothly. This organized board enables you to keep work on track.
You can also create lists to add your to-do work, keep track of every work, and never miss any deadlines.
Plus, the handy card feature allows you to represent your tasks, information, and workflow, making it easier to see exactly what needs to be done and when.
Features
The Features of Trello are—
- Allows you to view your team’s projects from every angle.
- Automates tasks and workflows with Butler automation.
- Able to link your team’s favorite tools and boost them up.
- Gives a blueprint and guide to your team’s success with easy-to-use templates.
- This function obtains information about your team’s software and suggests new software to help them do the work more quickly.
Asana
Pricing
Pricing starts from Free to $10.99 to $24.99 on the advanced level per month.
Overview
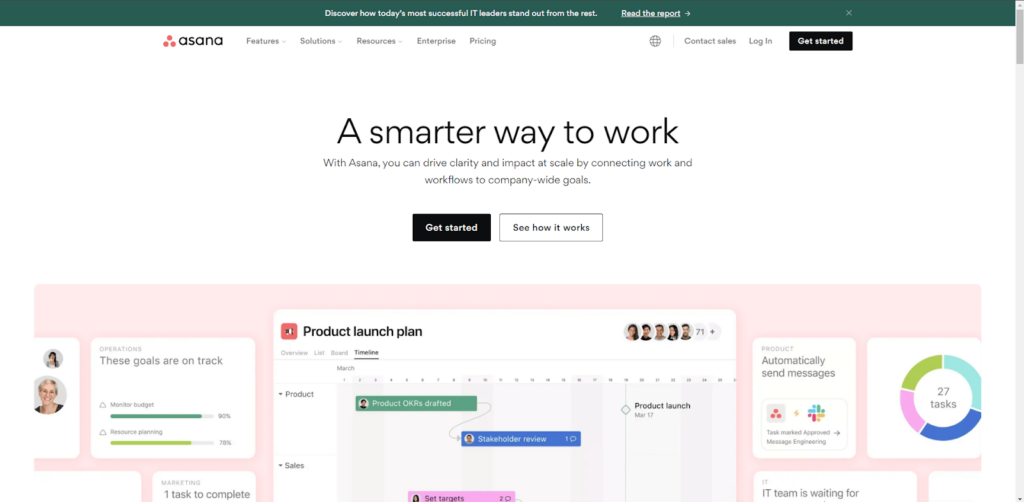
Asana is a top-tier project management tool designed to boost business performance. Over 100,000 organizations use it to enhance their marketing strategies. Known for its excellent Kanban board, Asana stands out for its precision and consistency.
What sets Asana apart is its ability to integrate seamlessly with AI-generated content, making it reliable and forward-thinking. It aligns strategic goals to keep companies on a successful track, smoothly driving progress with AI as its co-pilot.
Features
The features of Asana are—
- It enables smooth management of your projects.
- Provides clear goals and detailed reporting.
- Ensures workflows are smooth and automated.
- Offers reliable resources for effective management.
- Includes admin and security features.
Monday
Price
Monday.com’s pricing starts from free to customized plan.
Overview
monday.com is a leading work management platform, offers customizable solutions for tasks like resource management, sales pipelines, and client projects, all with a simple drag-and-drop interface.
The platform integrates with tools and uses AI and automation to streamline repetitive tasks, boosting productivity.
Recognized as a leader in adaptive project management, monday.com provides real-time insights for data-driven decisions. Its flexibility grows with your business, offering a seamless experience across all departments.
Features
The features of Monday are—
- No Credit Card Required
- Allows you to tailor everything, from task management to project timelines.
- Seamless integrations and powerful automation features streamlines repetitive tasks, saving time and effort.
- 360° visibility into project progress and performance.
- Offers a unified platform for collaboration.
ClickUp
Pricing
ClickUp pricing plans are Free Forever, Unlimited, Business and Enterprise. These pricing tiers plan starts at $0, $7, $12 and Custom respectively.
Overview
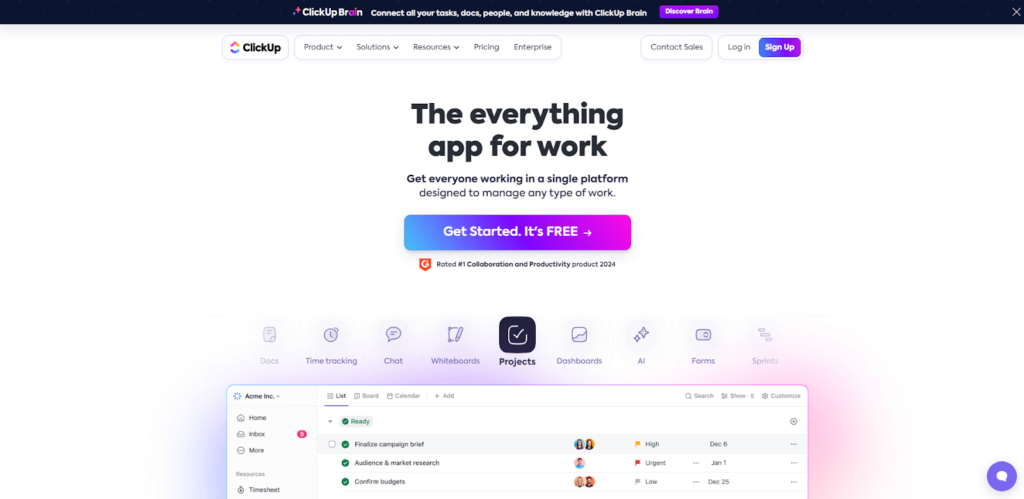
ClickUp is the go-to software for speeding up your work and boosting results. It’s built to save you time and help you accomplish more tasks efficiently. With ClickUp, you can manage and track all your work from a single platform.
The software enhances the quality of outcomes along with speeding up processes. Many top brands rely on ClickUp to customize the perfect team experience and deliver innovative results.
Features
ClickUp has so many features like—
- Forms enable you to collect all necessary information in one central location.
- The calendar view helps you schedule and track every task.
- Goals assist you in staying on track with your objectives.
- Chat facilitates smoother communication among team members.
- AI enhances your content, making it smoother and stronger.
5 Proven Tips for Effective Website Project Management
After learning about website project management, I’m excited to share some tips I discovered while navigating my website development project journey.
These insights come from real experiences, including my mistakes and the solutions I found. You won’t find these tips in any standard book or guide; they’re the proven tips that helped me and may guide you, too.
Create a Detailed Plan
A detailed plan is essential, especially in website management, before starting any project. Every stage—from initial concept to launch and beyond—needs clear planning. Without it, you risk feeling overwhelmed mid-project, potentially losing clients or derailing your business.
However, be open to change and adjust your plan as the project evolves. Sometimes, new insights and opportunities arise that can improve the outcome. Balancing a strong initial plan with flexibility will help you navigate challenges and find better solutions as you progress.
Select the Right Project Management Tool
You’ll find plenty of options when searching for a project management tool—but the best choice depends on your needs.
Not all tools will match everyone’s patience level or technical expertise, so it’s important to consider the user interface and essential features before investing. Likewise, many factors are important to check before pouring your green bucks into it.
If you ask me, I recommend OneSuite. It’s budget-friendly, user-friendly, and offers all the tools for effective project management. Give it a try—you’ll thank me later!
Communicate Consistently
Effective communication with your team, partners, and clients is essential in website project management.
Website development requires seamless collaboration across various teams—marketing, design, and development—to ensure everything is aligned. Without this cohesion, your website may end up looking disjointed and unprofessional.
To avoid this, integrate a reliable communication platform into your workflow. This will keep everyone in sync and streamline the process, helping each team contribute efficiently and creating a cohesive end product that meets everyone’s expectations.
Gather Feedback Regularly
Don’t hesitate to ask for feedback—it’s essential for improving and innovating.
While building your website, carefully consider whose feedback will be most valuable. This is a common challenge for anyone creating a website, and I faced the same question myself.
Seek feedback from your team members and potential users, as they can offer insights into what enhancements would make the website more effective and user-friendly. Their perspectives can help you refine your work and better meet audience needs.
Evaluate and Mitigate Risks
No business is without risk, but you can take steps to reduce it. Regularly evaluate your project and plan for the current and future stages.
By anticipating potential challenges, you can proactively mitigate risks before they arise. This proactive approach helps you save valuable time and resources, setting your business up for a smoother, more cost-effective journey.
Transforming Chaos into a Streamlined Process with OneSuite
In website project management, chaos can often derail your progress.
However, with OneSuite, you can transform that chaos into a streamlined process. By prioritizing clear communication, effective planning, and regular feedback, you create an environment where your team can thrive.
OneSuite’s user-friendly interface and robust features empower you to manage risks, collaborate seamlessly, and deliver a high-performing website that meets your clients’ needs.
Embrace OneSuite and watch your project management efforts flourish.
Find a Better Way to Grow
OneSuite streamlines projects, clients, and payments in one place, making growth hassle-free.


