How to Invoice a Client: 7-Step Guide to Getting Paid Fast

June 15, 2026
- A valid invoice needs six core elements: Miss the invoice number, the due date, or clear payment instructions and you give the client a reason to delay.
- Set payment terms before you start the work, not when you send the bill: Surprises at invoice time are the most common cause of slow payment.
- Send the invoice immediately after delivery: Every day you wait to send is a day added to when you get paid.
- Online payment options and automated reminders get you paid faster: Make paying a one-click action, not a chore the client has to remember.
- For repeat clients, automate it: Recurring and retainer work shouldn’t need a fresh manual invoice every month.
To invoice a client, you create a document that lists the work you did, what it costs, and how and when to pay you, then you send it and track it until the money lands. A complete invoice needs seven things: your details, the client’s details, a unique invoice number, an itemized list of services, the total due, the payment terms and due date, and clear payment instructions. Send it as soon as the work is delivered, set a firm due date, and follow up the moment it goes overdue.
That’s the whole job in one paragraph. The rest of this guide walks through each step so your invoices look professional, get approved without back-and-forth, and actually get paid on time. Because getting paid late isn’t rare: 85% of freelancers have invoices paid late at least some of the time, according to Remote’s 2025 Contractor Management Report. How you build and send the invoice has a lot to do with how often you end up on the wrong side of that.
What to Include on a Client Perfect Invoice
An invoice is a legal payment request, so a few of these are the must-haves if you ever need to chase a non-payer or hand your books to an accountant.
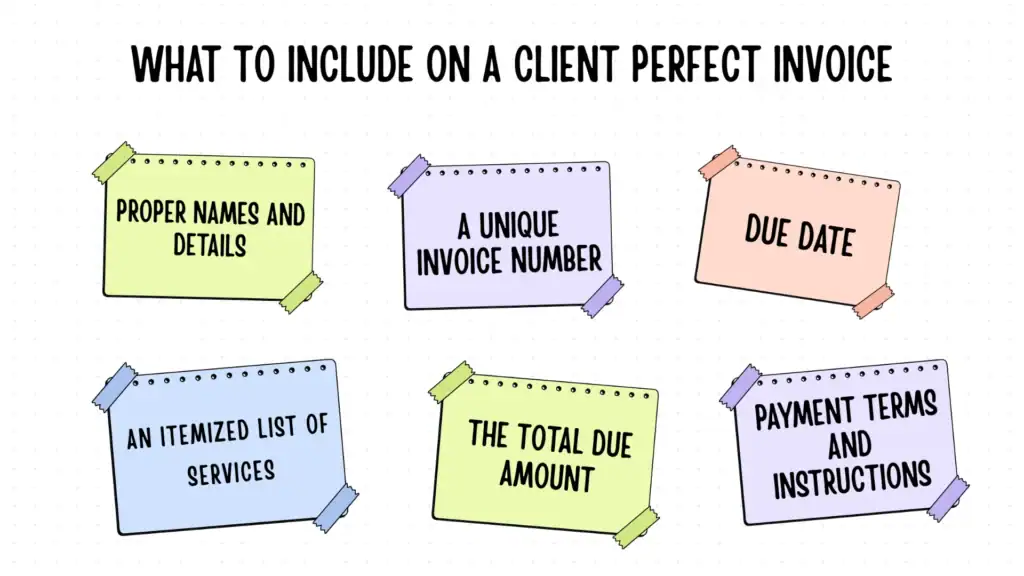
Every client invoice should include:
- Proper names and details: The exact legal name of the persons or businesses involved, plus their billing email or address, and tax ID. Send it to the person who actually processes payments, not just your day-to-day contact.
- A unique invoice number: A sequential number is fine (INV-001, INV-002). This is how both of you reference the invoice later, and accountants need it.
- The invoice date and the due date: The date you issued and the exact date payment is expected. “Due on receipt” or “Net 30” isn’t enough on its own. Write the actual date.
- An itemized list of services: Each task or deliverable on its own line, with the quantity, rate, and line total. Vague invoices (“consulting, $4,000”) get questioned. Specific ones get paid.
- The total amount due: Subtotal, any tax, any discount, and the final figure in bold. Include the currency if you work with international clients.
- Payment terms and instructions: How they pay (bank transfer, card, PayPal), where they send it, and any late fee policy.
Get those seven right, and you’ve built an invoice that’s hard to argue with. Now here’s how to put it together and send it.
How to Invoice a Client, Step by Step
Step 1: Agree on the terms before you do the work
The best invoice is the one with no surprises on it. Clear everything, the rate, and the payment terms in writing before the first hour of work. That means the deliverables, the total or hourly rate, when you’ll bill, and how long the client has to pay.
This matters more than it sounds. Large invoices tend to be the ones paid late, partly because a big bill lands on someone who wasn’t expecting it and has to route it for approval. For larger projects, agree on a deposit up front and milestone payments along the way so you’re never carrying months of unpaid work.
Step 2: Choose how you’ll create and send the invoice
You have three real options. A spreadsheet or Word template is free and fine for your first few invoices. A dedicated invoicing tool generates a clean, numbered invoice in a couple of clicks and tracks what’s paid. An all-in-one platform goes further and pulls the client and project details in for you, so you’re not retyping the same information every month.
That last point is where manual invoicing quietly eats your time. In a connected platform like OneSuite, the client and the project are already in the system, so when you create an invoice, their details and your logged work populate themselves. You’re confirming numbers, not transcribing them. Whichever route you pick, the goal is the same: an invoice that’s consistent, numbered, and fast to produce, because the harder it is to make, the longer you’ll put it off.
Step 3: Add your details and the client’s details
Fill in your business information and the client’s at the top. Double-check the client’s legal name and the billing email. A surprising number of late payments are just invoices sitting in the wrong inbox.
If your client has a purchase order (PO) system, request the PO number and include it on the invoice, as many companies do not pay invoices without a PO number.
Step 4: List your services as clear line items
Break the work into lines that a non-expert can understand. For project work, list each deliverable. For hourly work, list the task, the hours, and your rate. If you track your time as you go, this step is almost automatic; the hours become the line items.
The clearer each line, the fewer “what is this charge?” emails you’ll get, and those emails are pure delay.
Step 5: Set the payment terms and a real due date
Add up your subtotal, apply any tax, and state the total clearly. Then set the terms. “Net 15” or “Net 30” tells the client how many days they have, but don’t stop there. Write the actual calendar due date next to it, because “Net 30” requires the client to perform calculations and provides them with some flexibility. “Due by July 8, 2026” doesn’t.
Shorter terms genuinely help. If your cash flow is tight, Net 14 beats Net 30, and “due on receipt” works for small, established clients. State any late fee here too, even a modest one, so it’s on the record before you ever need it.
Step 6: Add payment options and send it
Give the client the easiest possible way to pay. An invoice with a built-in pay button gets settled faster than one that asks the client to log into their bank and set up a transfer. Instant payment is also what clients now expect: in a 2023 Federal Reserve survey, 86% of businesses said they used faster or instant payments, with nearly half pointing to lower costs as the reason. Offer card, PayPal, and bank transfer, where you can, and let the client choose.
Then send it the day the work is done. Tools that attach a payable link, OneSuite, Stripe, PayPal, and most invoicing apps do this, turn the invoice into a one-click action instead of a task the client has to schedule.
Step 7: Track it and follow up
Sending the invoice isn’t the finish line. Note the due date, watch for the payment, and follow up the instant it’s overdue. A short, friendly reminder on day one of being late recovers more money than an awkward call three weeks in. Tools that flag overdue invoices and send the reminders for you take this off your plate entirely, which matters because chasing money is the part everyone avoids.
The short version: A client invoice needs six elements (your and customers details, an invoice number, itemized services, the total, payment terms with a real due date, and payment instructions). Agree terms before you start, send the invoice the day you deliver, offer one-click online payment, and follow up the moment it’s overdue. Freelancers who do these five things consistently sit on the right side of the 29% late-payment statistic.
Common Invoicing Mistakes That Delay Payment
Most late payments aren’t the client being difficult. They’re small invoice mistakes that hand the client a reason, or an excuse, to wait.
- Sending it late: The clock to getting paid starts when you send, not when you finish. A week’s delay in sending is a week added to your wait.
- Vague line items: “Services rendered, $3,000” invites questions. Itemize.
- No clear due date: “Net 30” without a calendar date is softer than an actual deadline. Write the date.
- Making payment hard: Bank details are buried in the footer and no online option means the client has to make an effort. Effort gets deprioritized.
- Not following up: The single most expensive habit. Across the UK economy, chasing unpaid invoices eats an average of 86 hours per affected business every year. Automating reminders is how you stop paying that tax with your own time.
- No record of terms: If the payment terms only ever lived in your head, you can’t enforce a late fee. Put them on every invoice.
How to Get Paid Faster
Speeding up payment isn’t about nagging harder. It’s about removing every reason to delay before the invoice even goes out. Three things move the needle most.
Make paying instant: Online and digital payment is the biggest lever. Avalara’s 2025 research found that across six major markets, e-invoicing shortened payment cycles by an average of 1.4 days, with UK adopters seeing the biggest drop in late payments at 4.8%, simply by making the invoice machine-readable and easy to act on. A pay button beats a PDF.
Automate the follow-up: Late payment is rarely refused, it’s forgetting. A UK survey by the Federation of Small Businesses found 24% of small firms are paid up to 60 days late, and the same report found 61% of small businesses say late payments hold their business back. Automated reminders that fire on the due date and a few days after recover a lot of that quietly, without you having to play debt collector. Status tracking that shows you at a glance what’s sent, viewed, paid, and overdue is what makes this manageable across more than a handful of clients.
Shorten your terms and ask for deposits. Net 14 instead of Net 30. A deposit before you start. Milestone payments on big jobs. None of these are pushy; they’re standard, and they keep you from financing your client’s business for free.
Invoicing Recurring Work and Retainers
If you bill the same client every month, a retainer, a maintenance plan, or an ongoing service, recreating the invoice by hand each cycle is wasted effort and an easy thing to forget. Recurring invoicing solves this: you set the amount, the schedule, and the terms once, and the invoice goes out automatically on the date you chose.
This is where an all-in-one platform earns its keep. OneSuite’s recurring invoices, for example, run on eight schedules from daily to yearly, and each recurring series can be tied to the project it bills against, so the money is always connected to the work. Worth knowing: it auto-sends the invoice on schedule rather than auto-charging a saved card, so the client still pays through the gateway link each cycle and keeps visibility over what they’re paying for. For retainer relationships, that visibility is usually the point. The aim isn’t to bill people without them noticing, it’s to never let a recurring invoice slip your mind.
Frequently Asked Questions
What should an invoice include to be legally valid?
At minimum: your name and contact details, the client’s details, a unique invoice number, the issue date, an itemized description of what you’re charging for, the total amount due, and your payment terms. If you’re registered for sales tax or VAT, you also need your tax number and the tax breakdown. Requirements vary by country, so check your local rules, but those elements cover the basics almost everywhere.
How soon should I send an invoice after finishing the work?
The same day, or the next business day at the latest. The time you take to send the invoice is added directly to how long you wait for payment, and an invoice that arrives while the work is fresh in the client’s mind gets approved faster than one that shows up weeks later.
What are standard payment terms for freelancers?
Net 30 (payment due 30 days after the invoice date) is the most common, but Net 14 and Net 15 are increasingly normal and get you paid sooner. For small or trusted clients, “due on receipt” is fine. Whatever you choose, always write the actual due date on the invoice, not just the term.
What do I do if a client doesn’t pay?
Start with a polite reminder on the day it’s overdue, then a firmer one a week later that references your late fee. Most overdue invoices are simple oversights that a reminder or two clears up, so consistent, unemotional follow-up resolves the large majority. If it drags well past that, send a formal final notice, then consider a collections service or small claims court for larger amounts.
Should I charge a deposit?
For any sizeable project, yes. A deposit of 25% to 50% up front protects you if the client disappears and signals that you both have skin in the game. Pair it with milestone payments on long projects so you’re never carrying months of completed, unpaid work.
Can I automate invoicing for repeat clients?
Yes, and you should. Recurring invoicing tools let you set the amount and schedule once and send the invoice automatically each cycle. Platforms that connect invoicing to your projects and clients, like OneSuite, go a step further by pulling the client and project details in for you, so even one-off invoices take seconds instead of minutes.
The Bottom Line
Invoicing a client well isn’t complicated, but the details decide whether you get paid in a week or chase the money for two months. Build a complete invoice with all seven elements, agree the terms before you start, send it the day you deliver, make paying a one-click action, and follow up the moment it’s late. Do that consistently and you’ll spend less time on admin and more time on the work you actually get paid for. And once your client list grows past a handful, lean on tools that track, remind, and recur for you, so invoicing becomes something that happens in the background instead of a monthly chore you dread.
Start exploring OneSuite today
No credit card is required