

A Step-by-Step Client Onboarding Checklist for Service Businesses

August 18, 2026
Winning a new client feels exciting. The proposal is approved, the contract is signed, and the first payment arrives.
But this is also where the real work begins.
Now your team needs the right information, files, account access, approvals, timelines, and responsibilities before delivery can move forward. When these steps are not organized, onboarding quickly turns into repeated emails, missed details, delayed projects, and clients asking what happens next.
And the problem is rarely the quality of your service.
It is usually the lack of a clear process between closing the deal and starting the work.
A strong client onboarding system gives every new client a clear path forward. It helps your team collect what it needs, set expectations early, assign responsibilities, and begin the project without unnecessary confusion.
The good news is that you do not need to build that process from scratch.
This guide gives you a complete client onboarding checklist for agencies and service businesses, along with the common mistakes to avoid and the steps you can automate.
Let’s begin.
What Is Client Onboarding and Why Does It Matter?
Client onboarding is everything you do to move a new client from “we’re ready to work together” to “the project is ready to begin.” It usually starts after the contract is signed and the first payment is made. A clear client onboarding workflow organizes these activities into a repeatable sequence with defined responsibilities and completion points.
During onboarding, you collect the client’s information, files, and account access. You also confirm the project scope, introduce the team, set deadlines, and explain how communication, feedback, and approvals will work.
Why does this matter?
Clients do not want to make a payment and then wonder what happens next. A structured onboarding process gives them clear direction and shows that your team is prepared.
It also makes the project easier to manage. You spend less time chasing missing files, answering repeated questions, or resolving misunderstandings. Both sides understand what to expect and what they are responsible for.
A smooth start builds trust, reduces delays, and helps prevent early client churn. More importantly, it creates the foundation for a productive and lasting client relationship.
Common Client Onboarding Mistakes
Before following a client onboarding checklist or automating the process, it is important to understand where onboarding usually goes wrong.
During an interview, Reza, founder of TechNext, shared several common mistakes his development company has experienced while onboarding clients. –
“According to him, most problems are not caused by poor service. They begin when information is missing, responsibilities are unclear, communication is scattered, or the client does not know what happens next.”
Here are the most common client onboarding mistakes agencies and service businesses should avoid.
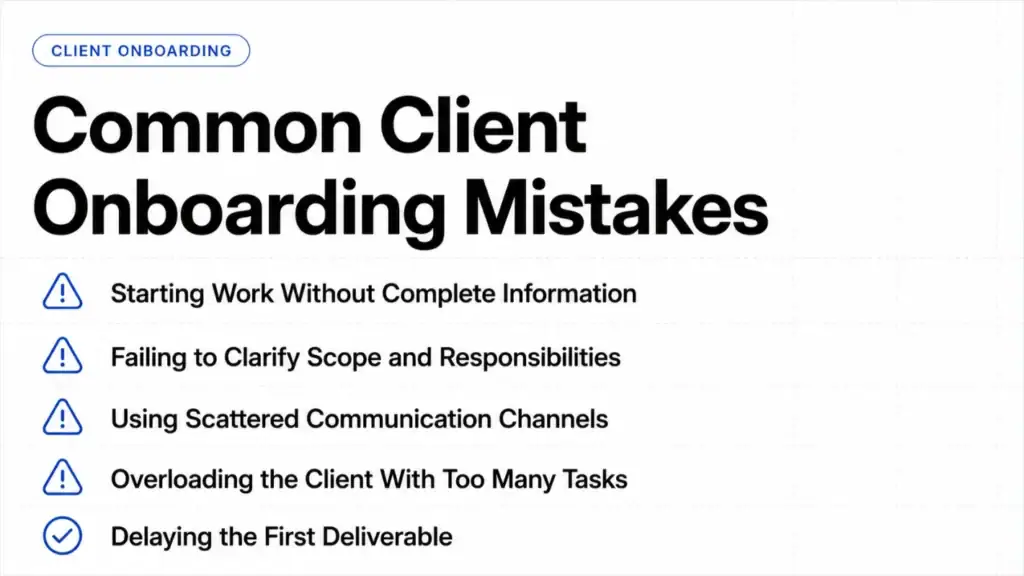
Starting Work Without Complete Information
Starting quickly may seem efficient, but it often creates delays later. The team may begin with an incomplete brief, outdated brand files, incorrect account access, or requirements the client has not approved.
Before work begins, confirm that all essential files, information, permissions, and decisions are available. Record anything that is still missing, assign responsibility for collecting it, and explain how it may affect the timeline.
Failing to Clarify Scope and Responsibilities
A client may expect additional deliverables because they assume those tasks are included. At the same time, the agency may be waiting for content, access, feedback, or approval without clearly explaining that these are the client’s responsibilities.
Define what is included, what is excluded, who owns each task, and how revisions or additional requests will be handled. Clear boundaries help prevent scope creep, missed deadlines, and difficult payment discussions.
Using Scattered Communication Channels
When project details are spread across email, WhatsApp, calls, and private messages, important information can easily be missed. Team members may follow different instructions, making it difficult to know which decision or version is final.
Choose one main place for project communication, files, feedback, and approvals. After every call or meeting, record the key decisions and next steps in the shared client workspace.
Overloading the Client With Too Many Tasks
Sending a long form, multiple document requests, access requirements, and several meeting links at once can overwhelm a new client. They may delay the process simply because they do not know where to begin.
Give the client the first three to five actions in a clear order. Collect only what is needed for the current stage, set realistic deadlines, and request the remaining information when it becomes relevant.
Delaying the First Deliverable
A client may lose confidence when they make a payment but do not see meaningful progress for several weeks. Status updates are helpful, but clients also need something that shows the project is moving forward.
Plan an early deliverable, such as an audit, roadmap, setup, strategy outline, concept, or sample. Deliver it within the first agreed milestone, explain what it means, and ask for focused feedback before moving to the next stage.
Now that you know the most common onboarding mistakes, use the complete client onboarding checklist below to create a clearer and more organized process for every new client.
Complete Client Onboarding Checklist for Agencies and Service Businesses
A well-planned client onboarding checklist helps your team stay organized and gives every new client a clear, professional start. It ensures that important tasks, documents, payments, responsibilities, and expectations are confirmed before the actual work begins.
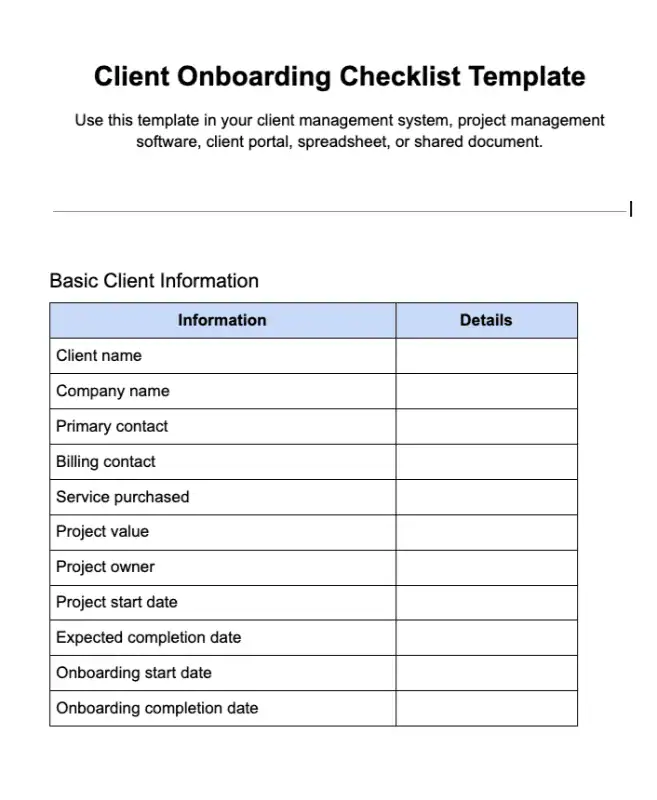
The process benefits both sides. Your agency spends less time chasing missing information, while the client always knows what is happening and what they need to do next. When supported by client management software, the checklist can also keep contracts, projects, communication, files, approvals, and payments in one organized place.
Here are the 12 essential steps to include in your client onboarding checklist.
1. Confirm the Contract and Payment
Before starting the project, make sure the client has signed the contract and completed the required initial payment. This gives both sides a clear understanding of the scope, cost, timeline, and responsibilities.
The contract should cover:
- Client and business information
- Services, scope, and deliverables
- Project timeline and deadlines
- Client and agency responsibilities
- Feedback, revisions, and approvals
- Payment schedule and methods
- Cancellation and confidentiality terms
- Process for requesting additional work
To make this step easier, use an online contract template that can be customized for each client and signed electronically. Clearly mention what is outside the agreed scope to prevent confusion and unexpected work.
After approval, keep the signed contract, invoice, and payment record in the client profile. Begin work only after the agreement and initial payment are confirmed.
2. Complete the Sales-to-Team Handoff
A client should not have to explain the same project twice. Before delivery begins, sales should give the working team a clear summary of what the client purchased, what they want to achieve, and what was agreed during the sales process.
Record the client’s goals, scope, deadlines, priorities, preferences, key contacts, and any special promises. Highlight missing information and possible risks so the team can address them early. Assign a project owner who will take responsibility for the relationship from this point forward.
Keep the handoff inside your project management software, where the team can review the brief, assign next steps, and track ownership without searching through old emails or messages.
3. Create the Client Profile and Project Workspace
After the handoff, set up a central workspace for the client. Start with their company details, primary contact, billing information, signed agreement, and service history. Then create the project with its deliverables, deadlines, tasks, files, and responsible team members.
Organize the workspace so everyone knows where to find updates and what needs attention next. Set the correct access permissions before inviting the client, especially when the project contains confidential documents or internal discussions.
A client portal software gives clients a simple place to follow progress, share files, comment on work, approve deliverables, and view invoices. It keeps collaboration organized while reducing scattered emails and repeated status requests.
4. Send a Welcome Email
Once the client workspace is ready, send a short welcome email to officially begin the relationship. Introduce the main point of contact, share the workspace invitation, and explain the next few actions in the order they should be completed.
Include the onboarding form, kickoff booking link, preferred communication channel, and deadlines for any client tasks. Keep the email focused so the client can quickly understand what to do next without feeling overwhelmed.
5. Collect Client Information, Files, and Access
Use a structured onboarding form to collect the materials required for delivery. The exact request will depend on the service, but it may include:
- Business background and target audience
- Brand guidelines and visual assets
- Existing content and campaign data
- Competitor examples
- Website, analytics, advertising, or social platform access
- Technical or compliance requirements
- Examples of preferred styles or outcomes
Separate urgent requirements from items that can be provided later. Track missing items and use secure methods for sharing account access instead of requesting passwords through email.
6. Schedule the Client Kickoff Meeting
After reviewing the submitted information, arrange a kickoff meeting with the client’s decision-maker and relevant team members. Use the meeting to resolve unclear points, discuss priorities, identify dependencies, and make sure everyone understands how the engagement will work.
Send a simple agenda beforehand and keep the discussion focused. At the end, confirm the immediate actions, who owns each one, and when they are due. Share written meeting notes afterward so decisions are not lost.
7. Define Goals, Scope, and Success Metrics
Turn the client’s expectations into specific outcomes the team can plan and measure. For example, replace a broad goal such as “generate more leads” with a clear target, measurement method, and review period.
Document the final objectives, performance indicators, starting benchmarks, target results, and factors that may affect success. Confirm the boundaries of the work and get the client’s approval before delivery begins. This gives future reports a clear purpose and prevents both sides from judging success differently.
8. Set the Project Timeline and Responsibilities
Break the project into clear phases, milestones, and delivery dates. Instead of showing only the final deadline, map out when drafts, reviews, approvals, and final deliverables are expected.
Assign one owner to each task and note any action required from the client. Include dependencies as well. For example, if the client delays access or approval, the next delivery date may need to move. Share the timeline with everyone involved so responsibilities remain visible throughout the project.
9. Establish Communication and Approval Rules
Agree on where project conversations will happen and how often the client will receive updates. Choose one main channel for communication to prevent decisions and feedback from becoming scattered across emails, calls, and private messages.
Confirm:
- Primary contacts on both sides
- Expected response times
- Update and meeting frequency
- Where feedback should be submitted
- Who can approve deliverables
- How revision requests will be handled
- What qualifies as an urgent request
- How delays or scope changes will be communicated
Ask the client to provide one clear, combined response whenever several people are reviewing the work. This avoids conflicting feedback and unnecessary revisions.
10. Deliver the First Quick Win
Give the client an early result that is useful, visible, and connected to their main goal. Depending on the service, this could be an initial audit, strategy outline, design concept, technical improvement, campaign setup, or sample deliverable.
A quick win should demonstrate progress without sacrificing quality or creating unrealistic expectations. Deliver it within the agreed early milestone, explain why it matters, and ask for focused feedback. This builds confidence, confirms that the team is moving in the right direction, and creates momentum for the rest of the engagement.
11. Collect Client Feedback
After the first deliverable, ask the client for focused feedback while the onboarding experience is still fresh. Find out whether the process was clear, communication felt organized, and the initial work matched their expectations.
Use a short form or follow-up conversation to ask:
- Was the onboarding process easy to follow?
- Were the next steps and responsibilities clear?
- Was any information difficult to provide?
- Did the first deliverable meet expectations?
- Is anything still unclear or missing?
- What could make the experience better?
Record the feedback and turn useful comments into clear actions. Addressing concerns early helps prevent larger issues later and gives the team an opportunity to improve its onboarding process.
12. Confirm Onboarding Completion
Before moving the client into active delivery, review the checklist and confirm that every essential requirement is complete. Make sure the agreement and payment are confirmed, required access has been provided, responsibilities are assigned, and the project plan has been approved.
Then send a short onboarding completion message summarizing:
- What has been completed
- Current project status
- The next milestone
- Upcoming client actions
- The next meeting or update date
- Where to find project information
Mark the onboarding stage as complete and move the project into its regular delivery workflow. The client should now know what happens next, who to contact, and how progress will be managed.
How to Automate Client Onboarding
Client onboarding becomes much easier when repetitive steps are handled automatically. With OneSuite, you can move clients from signed agreement to active project without relying on long email threads, scattered files, or manual follow-ups.
Automate Client Invitations and Welcome Emails
Invite clients to their portal as soon as a deal is confirmed. Send a welcome email with login details, next steps, meeting links, and instructions for uploading required files.
Use Reusable Project Templates
Use project templates to create repeatable onboarding workflows in seconds. Add predefined tasks, stages, custom fields, deadlines, and team responsibilities so every client receives the same organized experience.
Automate Tasks, Reminders, and Follow-Ups
Automatically create onboarding tasks, assign team members, set deadlines, and send reminders for missing documents, approvals, payments, or meetings. This helps your team stay on track without checking every step manually.
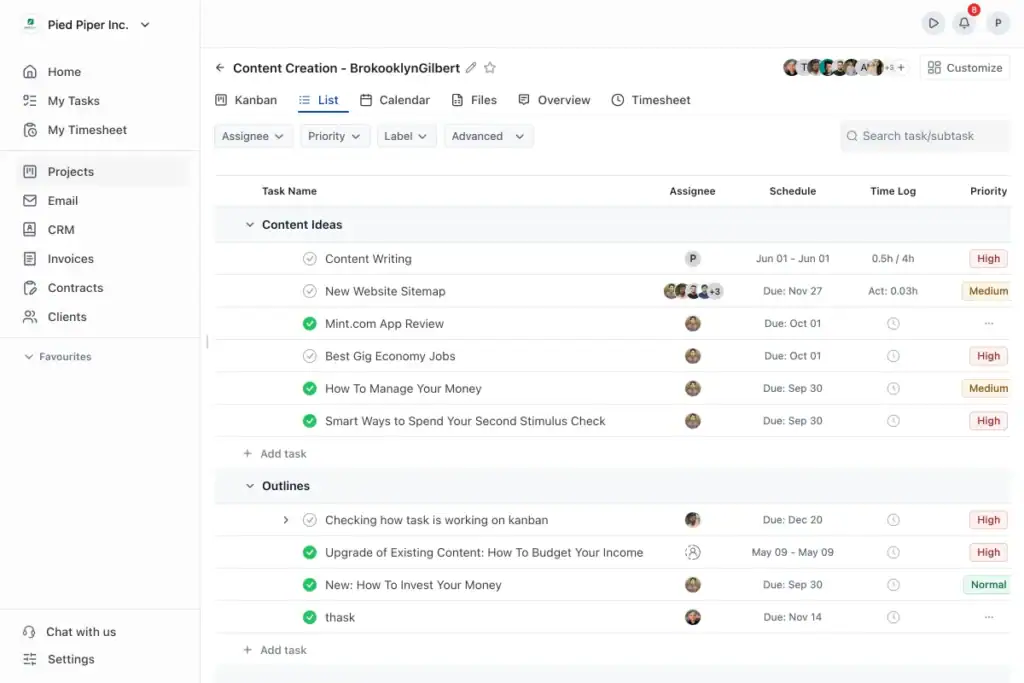
Centralize Documents, Communication, and Payments
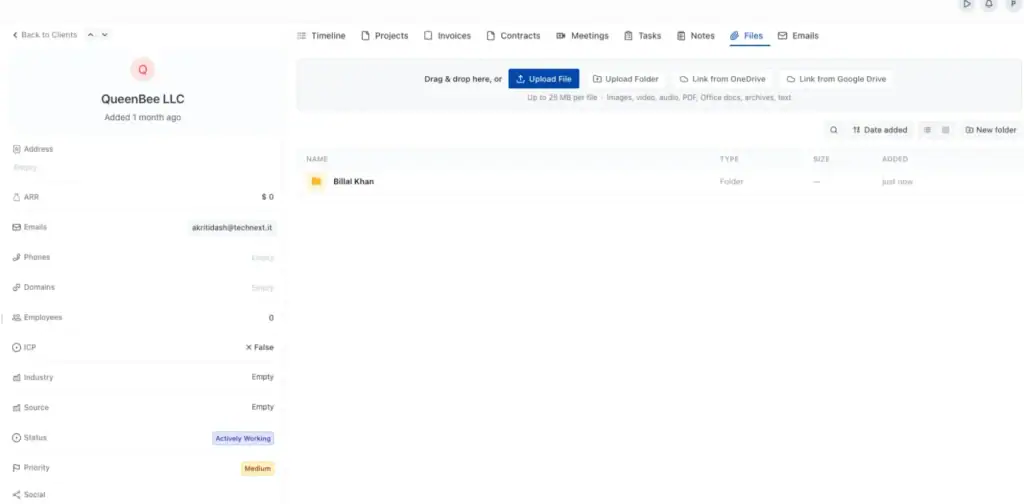
Keep client files, emails, meetings, invoices, and project updates inside one connected workspace. Clients can upload documents, book meetings, review progress, and manage payments without unnecessary back-and-forth communication.
Simplify Client Onboarding With OneSuite
Client onboarding should be simple for your team and easy for the client to follow. With OneSuite, you can manage the entire process from one connected workspace instead of switching between emails, spreadsheets, file-sharing tools, calendars, and invoicing software.
Here is how the process can work step by step.
1. Confirm the Agreement and Payment
Start by confirming that the contract is signed and the initial payment is complete. Keep the agreement, invoice, and payment information connected to the client record so your team can quickly check the project status.
2. Create the Client Workspace
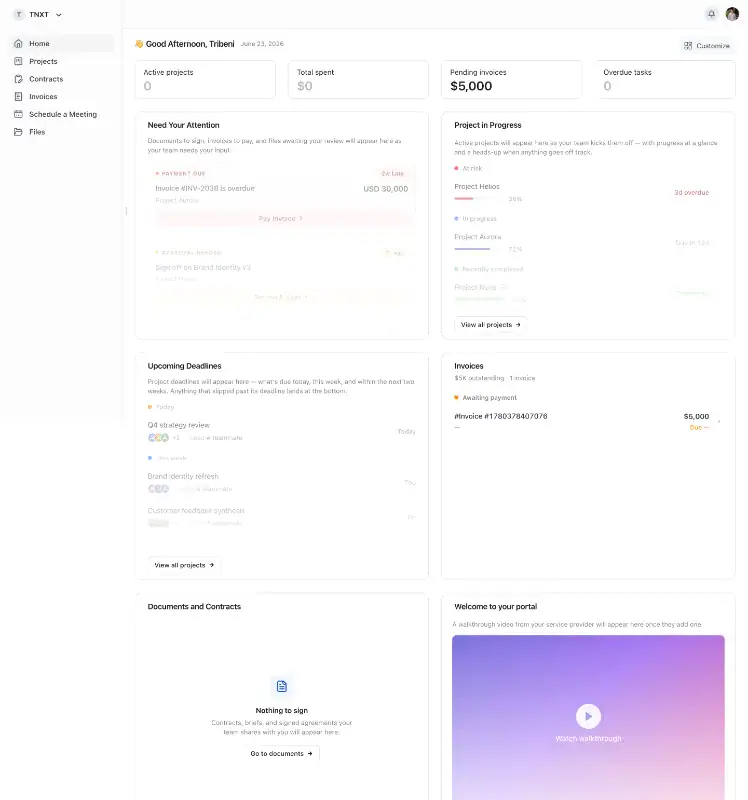
Add the client’s company details, contacts, billing information, and project requirements. Then create a dedicated workspace where the client can find their tasks, files, updates, meetings, and invoices.
3. Start the Project From a Template
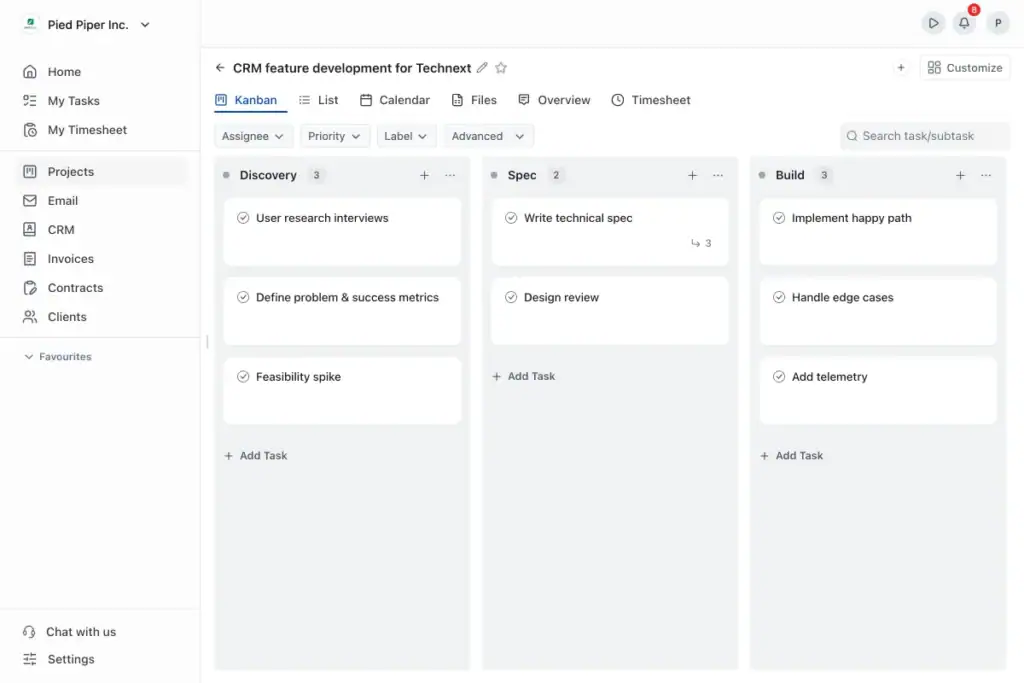
Choose a OneSuite project template instead of building the project from scratch. Templates can include predefined tasks, stages, custom fields, deadlines, and responsibilities, helping your team follow the same onboarding process every time.
4. Invite the Client and Collect Information
Send the client their portal invitation along with clear next steps. They can upload briefs, brand assets, documents, and other required files directly through the portal or their assigned Google Drive or OneDrive folder.
5. Schedule the Kickoff Meeting
Let the client book the kickoff meeting from their portal using Calendly, Google Calendar, or Microsoft Outlook. During the meeting, confirm the goals, scope, timeline, communication process, and approval responsibilities.
6. Manage the Project From One Place
Once onboarding is complete, your team and client can continue working from the same workspace. Emails, project updates, files, tasks, meetings, invoices, and payments remain connected to the client and project.
Ready to create a smoother onboarding process? Set up your client portal and start onboarding your next client with OneSuite.
Frequently Asked Questions (FAQs)
What Should a Client Onboarding Checklist Include?
It should include contract signing, payment confirmation, internal handoff, information collection, workspace setup, kickoff meeting, project goals, timelines, communication rules, and final approval. Every task should have a clear owner, deadline, and status.
How Long Should Client Onboarding Take?
Most agencies complete onboarding within five to ten business days. Simple services may take only a few days, while complex projects can require two weeks or more. The process should finish only when the team has the information, access, and approvals needed to begin.
What Information Should You Collect From a New Client?
Collect the client’s business details, goals, target audience, key contacts, brand assets, existing files, competitor information, platform access, deadlines, and technical requirements. Request essential information first and collect secondary details later to avoid overwhelming the client.
Who Is Responsible for Client Onboarding?
An account manager, project manager, or client success manager should oversee the process. Sales handles the initial handoff, the delivery team confirms the requirements, and the client provides the necessary files, access, feedback, and approvals.
How Can Agencies Automate Client Onboarding?
Agencies can automate welcome emails, client records, project creation, task assignments, forms, reminders, invoices, and status updates. Kickoff meetings, strategy discussions, and important feedback should remain personal.
Start exploring OneSuite today
No credit card is required