
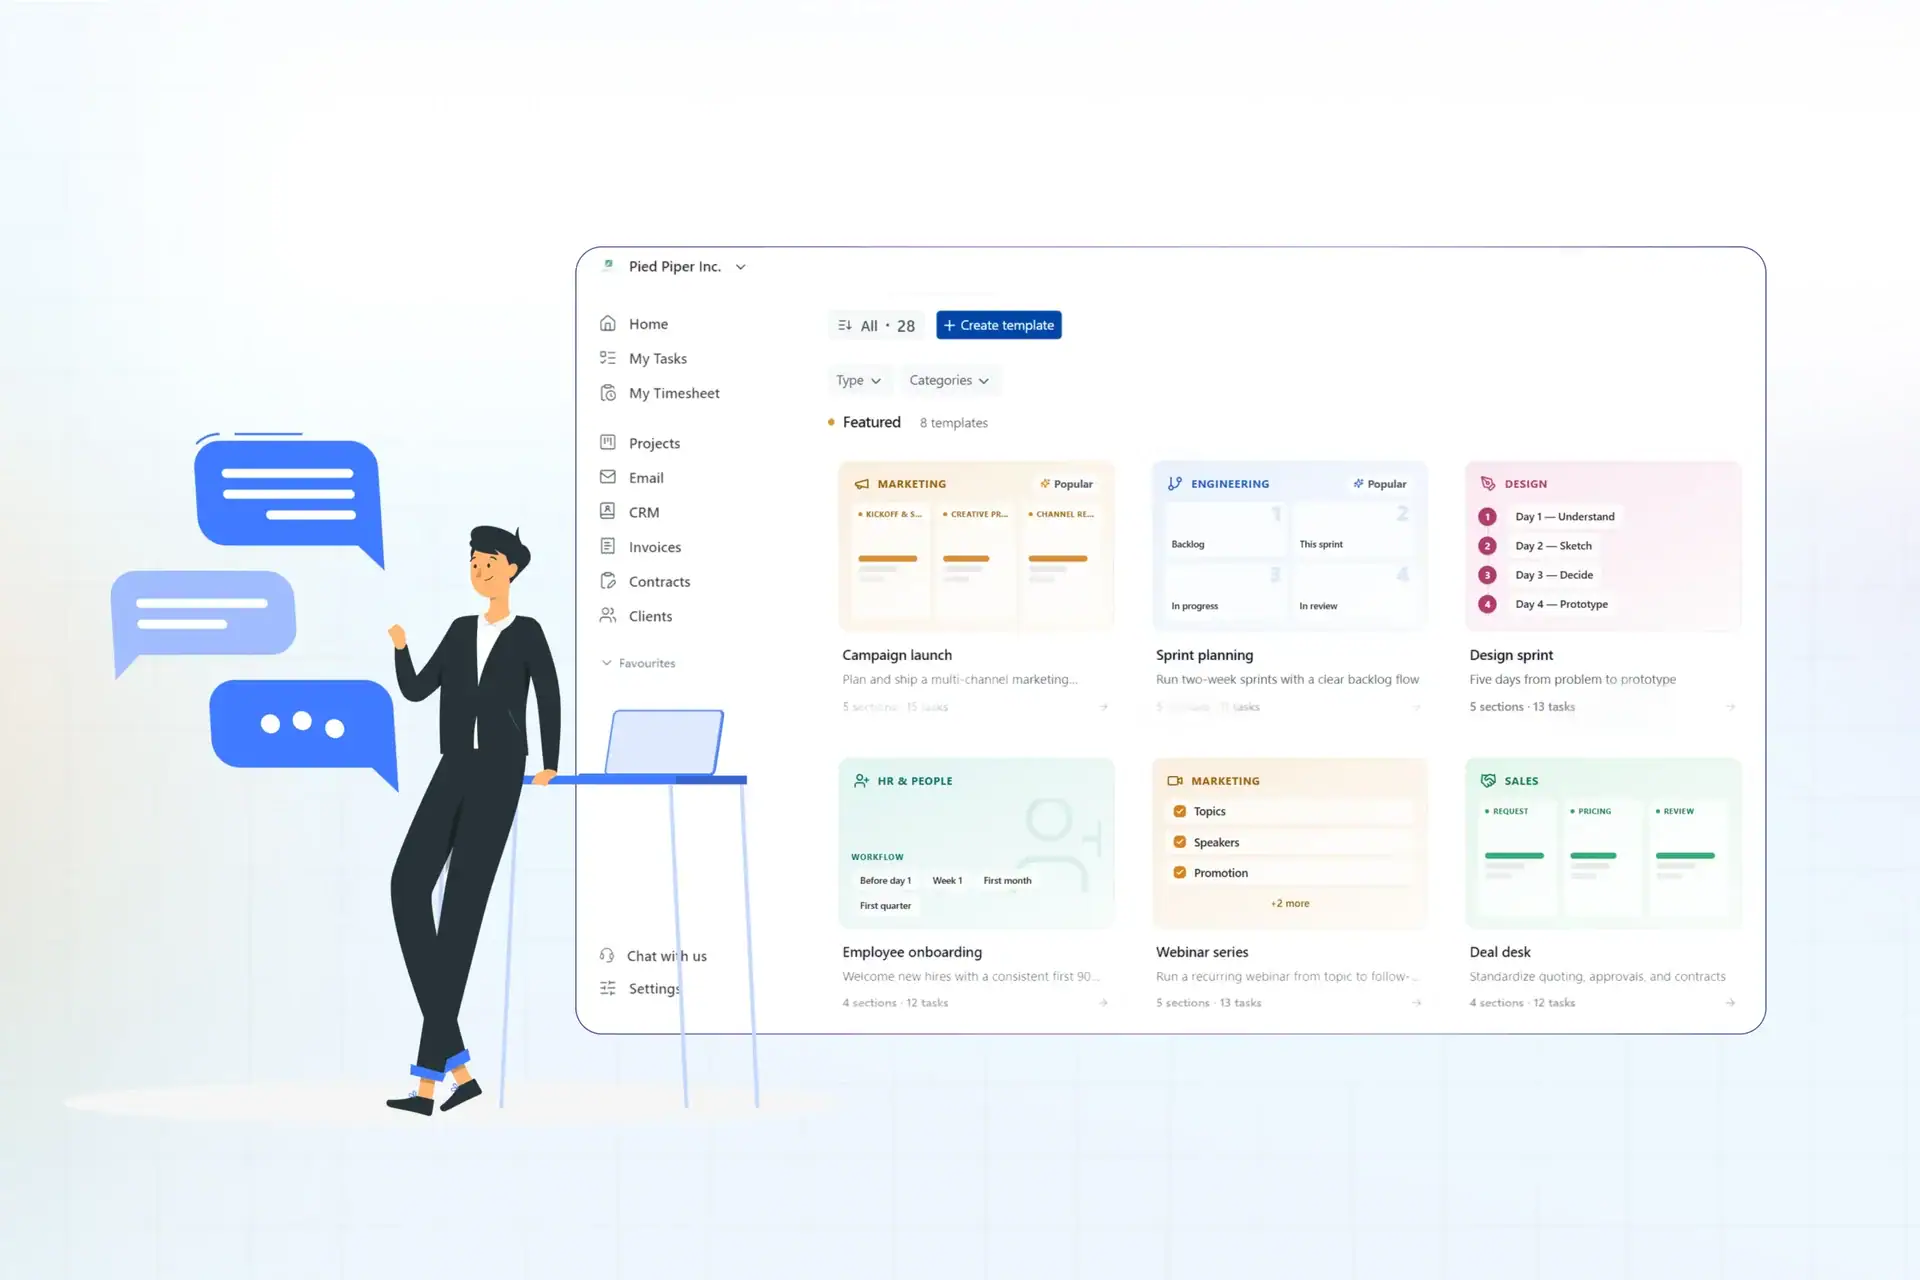
How to Create a Project Template in OneSuite

August 4, 2026
Stop rebuilding. Start reusing. OneSuite templates cut project setup from an hour to a minute. Save your process once, reuse it forever.
This guide will help you decide which workflows need a template, what an ideal template looks like, and how to create a project template or use a prebuilt one inside OneSuite.
So let’s start by deciding which workflow actually needs one.
Should you build a project template?
Templates pay off on repetition. Rate your workflow on two things, how complex it is and how often you run it, and let the answer decide:
| Frequency | Complexity | What to Do |
|---|---|---|
| Low | Low | Create projects manually |
| Low | High | Wait. Revisit if the process picks up |
| High | Low | Build a simple checklist template |
| High | High | Build a full project template today |
By complexity we mean stages and handoffs, not just task count. A workflow that hands off to the client and waits on their input is complex even if it is short.
Common workflows worth templating
- Client onboarding
- Monthly retainer cycles
- Website or app builds
- Campaign launches
- Sprint cycles
- Employee or vendor onboarding
- Anything with a handoff between your team and the client
What a good project template includes
A project template isn’t a copy of one finished project. It’s the reusable skeleton underneath it, the parts that stay the same every time, with the client-specific details stripped out.
A solid template usually holds:
- Sections for each stage of the workflow
- Tasks and subtasks for the work inside each stage
- Estimated hours on the tasks that have a predictable length
- Priorities and labels so the important work stands out from day one
- Descriptions on anything a new team member might not know how to do
- Custom fields for details you track on every project, like a budget or a client tier
And it leaves out anything that changes from one project to the next:
- Client names, dates, and deadlines
- Notes or files tied to a single engagement
- People, unless the same person genuinely owns that step every time
- One-off tasks that won’t recur
The test is simple. If a detail will be different on the next project, it doesn’t belong in the template. Keep the shape, drop the specifics.
What a real template looks like
Onboarding is the one most teams template first. Here it is in OneSuite, seven sections and thirty-three tasks, ready to reuse on every new client.
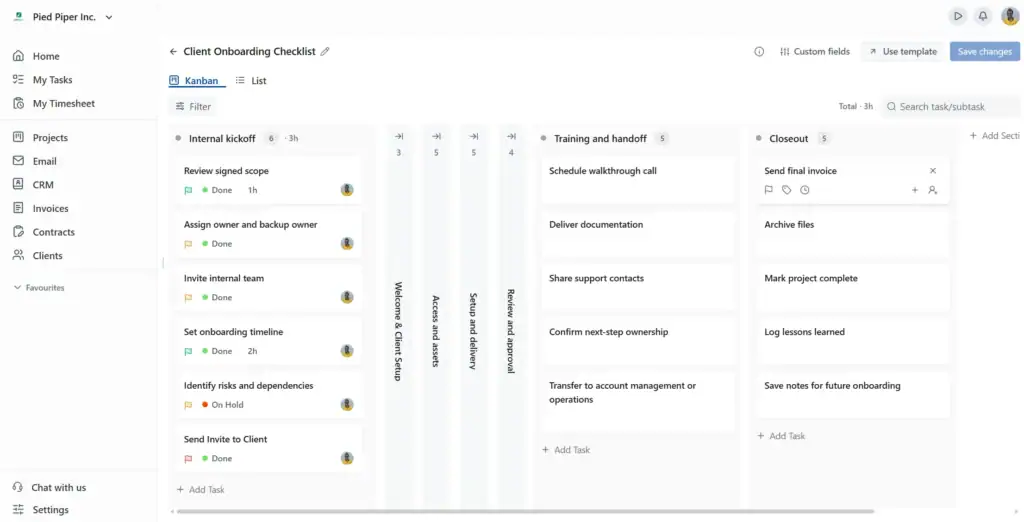
Building that by hand takes the better part of an hour. From a template, the next one takes under a minute. That gap is the whole point.
See also: Learn how to onboard new clients using a checklist.
Where to find project templates in OneSuite
There are three routes into templates, and all of them land in the same builder. Pick whichever matches what you are doing right now.
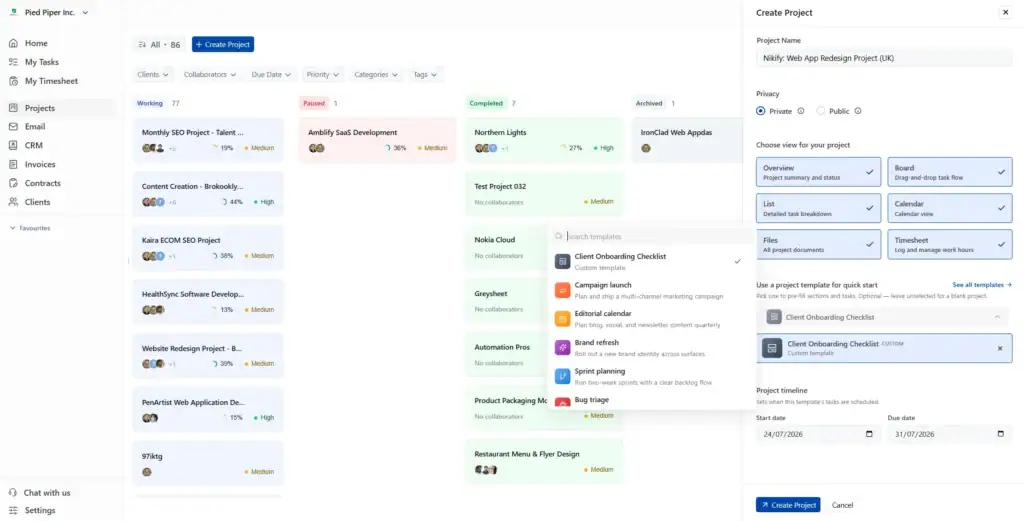
- From the Create Project drawer:
Go to Projects in the left sidebar and click Create Project. In the drawer that opens, look for Use a project template for quick start near the bottom. There is a searchable dropdown and a See all templates link.
- From Customize:
On the Projects page, click Customize in the top right, choose Project template, then either Create to jump straight into the builder or Browse all to open the library.
- From the All Templates page:
This is the full library. Filter by Type (All, Featured, My Templates) or by Category (Marketing, Sales, Engineering, Design, Product, HR & People, Operations).
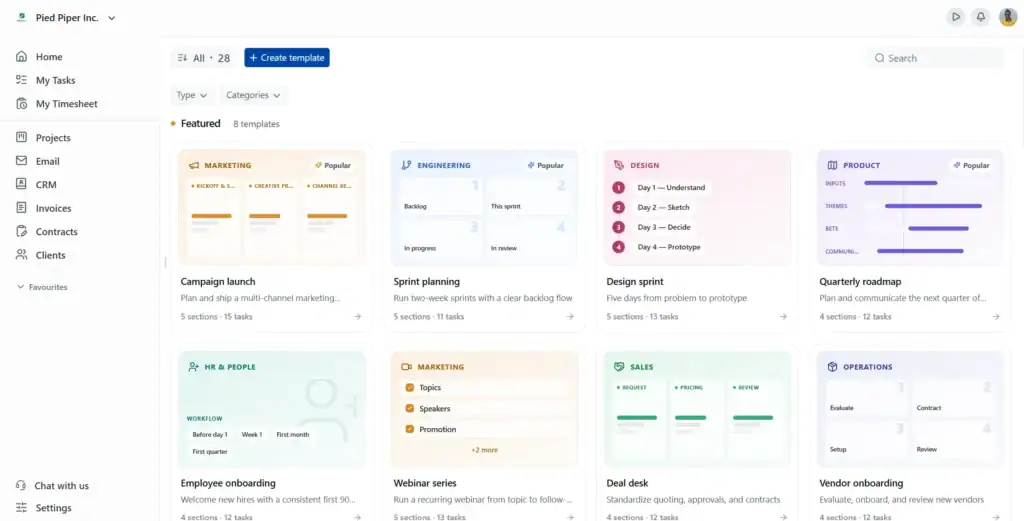
Featured templates cover the common workflows already, including Campaign launch, Sprint planning, Design sprint, Quarterly roadmap, Employee onboarding, Webinar series, Deal desk, and Vendor onboarding. Each card shows its section and task count so you can size it up before opening it. Your own templates live under My Templates, kept separate from the built-in set.
How to create a project template in OneSuite
From the All Templates page, click Create in the top left. That opens the template builder. Here is how to fill it.
🎥 Prefer to watch it instead? You can also watch the full process here:
Step 1: Name the template.
Click the pencil icon next to the title and give it a name.
Name templates after the engagement type, not the client. “Client Onboarding Checklist” stays useful forever. “Acme Corp Onboarding” is dead the moment the next client signs.
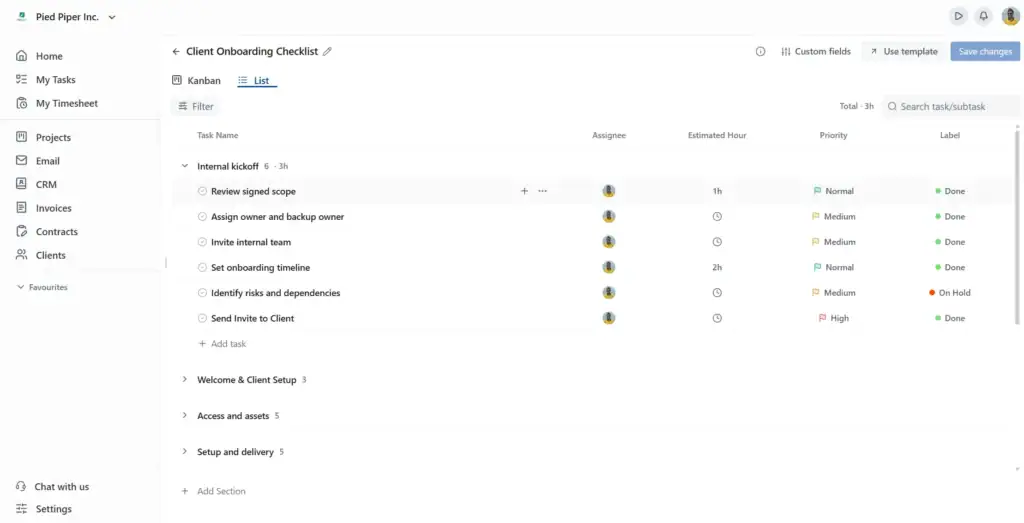
Most people sketch the structure in Kanban and then switch to List to fill in the detail.
Step 2: Add your sections.
Click Add Section and name each stage of the workflow. Put them in the order work actually happens.
As you build, each section header shows its task count and total estimated hours, so you can watch the shape of the workload form.
Step 3: Add tasks and subtasks.
Click Add Task inside a section, name the task, and use the subtask option to nest steps beneath it.
Subtasks earn their keep when you need to separate who does what. Group everything the client owes you under a “Client Tasks” parent and everything your team handles under “Internal Tasks.” Parent cards display a subtask count, so the board stays readable at a glance.
Write task names as actions. “Request logins and permissions” tells someone what to do. “Logins” leaves them guessing.
Step 4: Fill in the task details.
Every task and subtask can carry an assignee, estimated hour, priority, label, description, attachments, and links.
Estimated hours are the field to care about most here. OneSuite templates store effort rather than calendar dates, so the hours you enter become the scope estimate you inherit on every project built from this template. Section headers roll them up and the builder shows a running total in the top right. Fill them in once and every future project opens with a real number attached instead of a guess.
Note: Assigning tasks in a template sets a default owner for projects created from it. If the same person is not always going to do that work, leave the assignee blank rather than quietly loading up someone’s plate every time the template gets used.
Step 5: Save the template.
Click Save template in the top right. Your template now appears under My Templates in the library.
How to add custom fields to your template
No two workflows track the same information. A campaign needs a budget figure. A client project needs a tier or an approval status. A build needs a link to the brief. None of that fits the standard task properties.
Custom fields let you attach that information to the tasks inside your template, so every project created from it starts with the same context already structured.
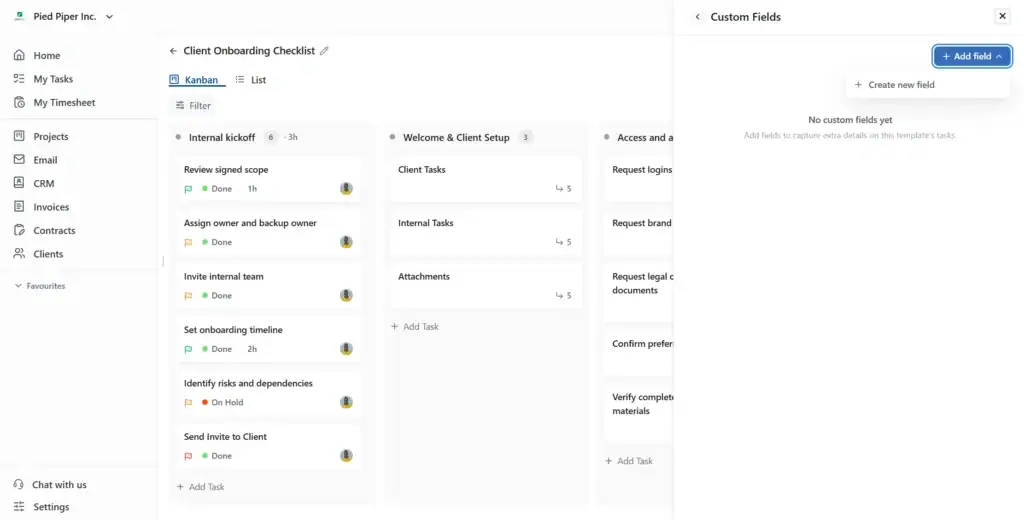
Click Custom fields in the top right of the builder, then Add field and Create new field.
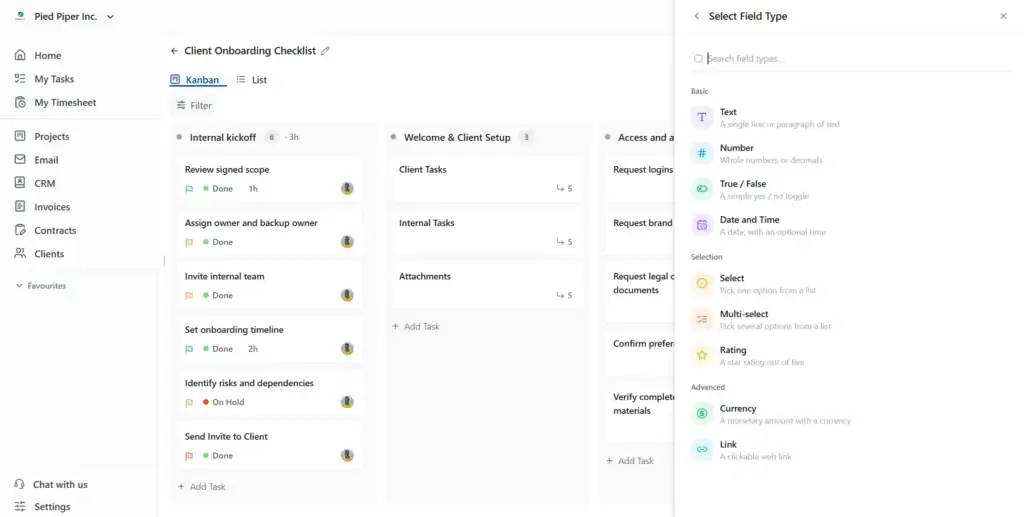
The field type picker is searchable and grouped into Basic, Selection, and Advanced.
| Field Type | What It Captures | What You Configure |
|---|---|---|
| Text | A single line or paragraph | Nothing beyond the name |
| Number | Whole numbers or decimals | Number or percentage, decimal places |
| True / False | A simple yes or no toggle | Default value |
| Date and Time | A date, with optional time | Display format, Relative or Default |
| Select | One option from a list | Options list, order, pre-selected option |
| Multi-select | Several options from a list | Options list, order, pre-selected options |
| Rating | A star rating out of five | Default star value |
| Currency | A monetary amount | Default currency |
| Link | A clickable web link | Nothing beyond the name |
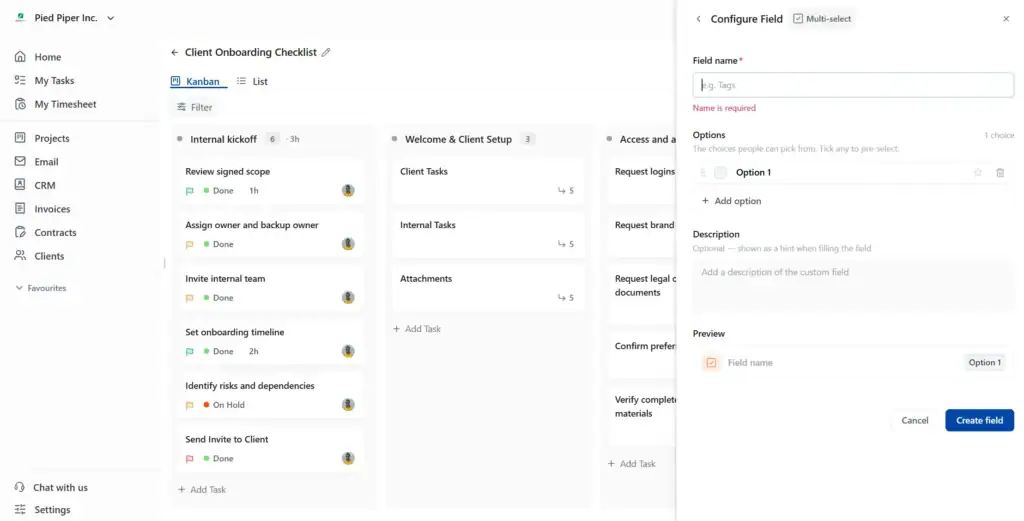
Every field follows the same flow. Enter a field name, which is required, configure anything specific to the type, add an optional description that appears as a hint when someone fills the field, check the live preview, then click Create field.
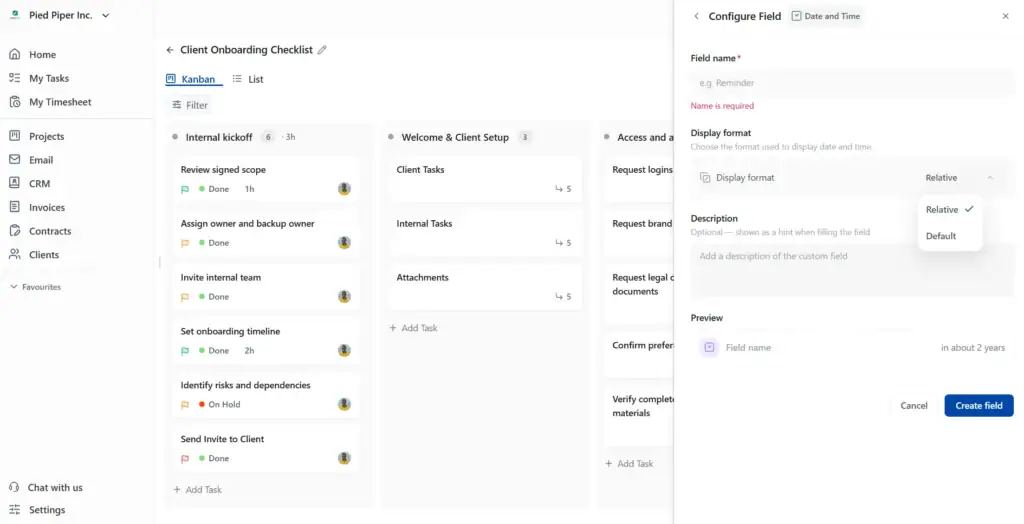
Two things are easy to miss. Percentage lives inside the Number field, not as its own type, so open the Number type dropdown before assuming it is missing. And the Date and Time field offers a Relative display format that shows elapsed or remaining time in plain language rather than a fixed date, which usually travels better across projects that run months apart.
For Select and Multi-select, build the options list in the same panel. Drag to reorder, tick an option to pre-select it, and use the delete icon to remove one.
How to preview a template before you use it
Click any template card in the library and a drawer opens showing the whole thing before you commit: total stages, total tasks, every section with its tasks and subtasks, and the priority, label, and estimated hours on each one. At the bottom you get Use template, Edit, and Cancel.
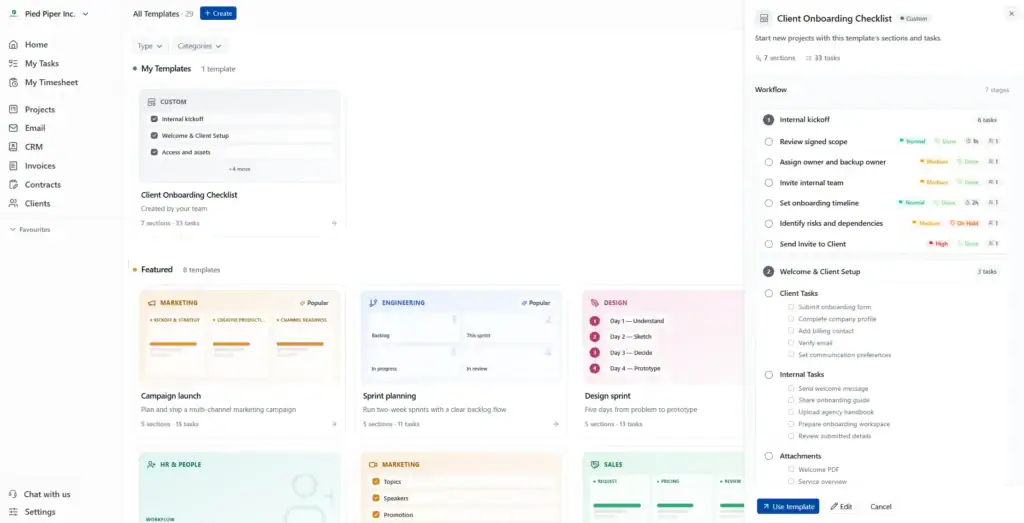
Worth doing with the built-in templates before you build your own. Opening two or three shows you how a well-structured workflow is put together, and you may find one close enough to your process to adapt instead of starting cold.
How to create a project from a template
With the template saved, here is how you put it to work.
Step 1:
Go to Projects and click Create Project.
Step 2:
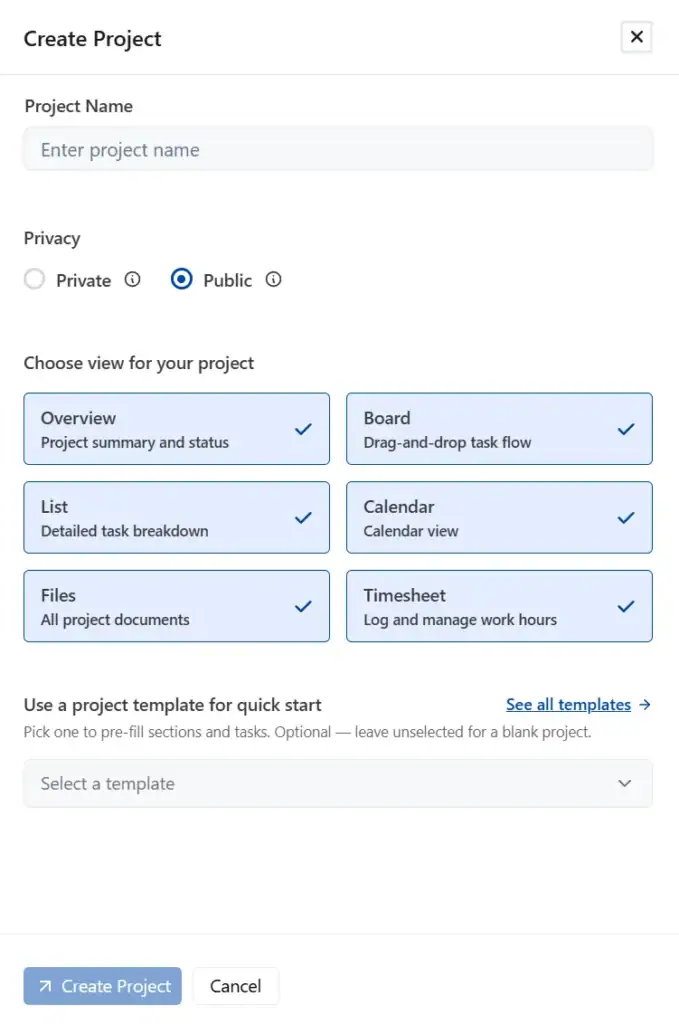
Enter the Project Name and choose Privacy, either Private or Public.
Step 3:
Under Choose view for your project, select the views you want. Overview, Board, List, Calendar, Files, and Timesheet are all switched on by default.
Step 4:
Under Use a project template for quick start, pick your template from the dropdown or search it by name. Your own templates sort to the top with a CUSTOM badge, above the built-in set. Once selected, the template also shows as a highlighted row below the dropdown with an × if you want to swap it out.
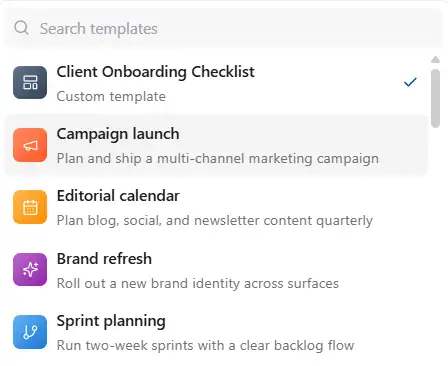
Selecting a template copies its sections, tasks, subtasks, descriptions, priorities, labels, estimated hours, attachments, links, and custom fields into the new project. You get the same starting point every time, and you can change anything you like once the project exists.
Step 5:
Set the Start date and Due date, then click Create Project.
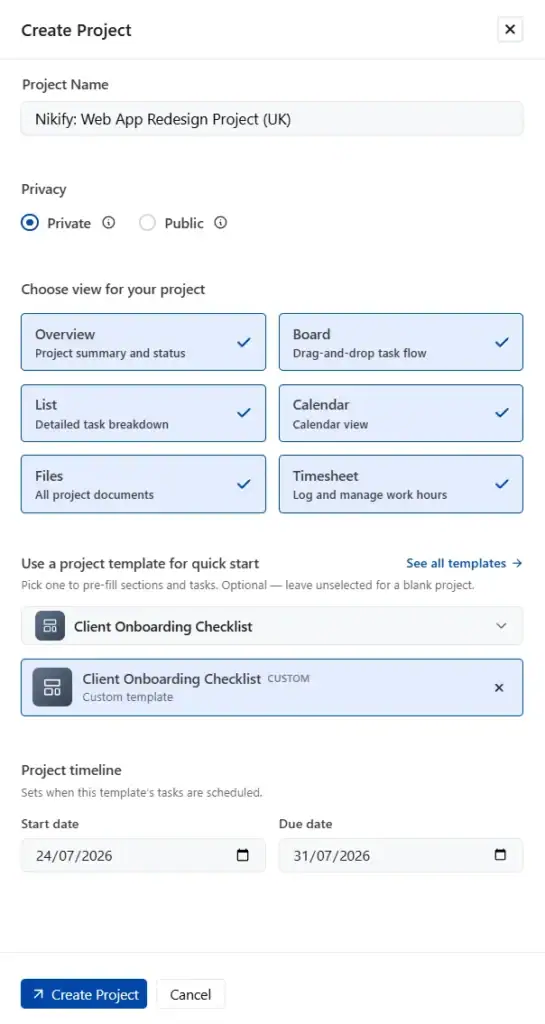
Note: The date fields only appear once you have selected a template. If you are looking for them on a blank project, they are not there. The start date pre-fills to today.
These dates set the project’s own timeline, the one that shows up in the Start Date and Deadline columns on your Projects list. They do not spread the template’s tasks across that window. Scheduling individual tasks stays yours to manage inside the project.
How to edit or delete a template
Each card on the All Templates page carries edit and delete icons. You can also open a template’s preview drawer and click Edit to go straight into the builder.
Here is the part worth knowing: editing a template does not change projects you already created from it. Templates are copied at the moment of project creation, not linked to it. Revise one whenever you like and everything in flight stays exactly as it is. Only future projects pick up the change.
That makes templates safe to improve as you learn. Next time an onboarding runs badly and you spot the missing step, add it to the template that afternoon. Nothing breaks.
Project template best practices
- Name by engagement type, not by client. Process names stay useful. Client names go stale.
- Keep it lean enough that people actually use it. An 80-task template gets half-deleted on every project until the team stops trusting it. Include what always happens and leave the rest to the project.
- Always fill in estimated hours. Highest-return field in the builder. It turns your template into a scope estimate, gives you a number to quote against, and makes your timesheet data mean something later.
- Write descriptions for anything non-obvious. The person running this in six months might not be you. One line of context costs nothing and saves a Slack message.
- Use subtasks to split client work from internal work. Grouping client-facing steps under one parent makes it obvious what you are waiting on someone else for.
- Leave assignees blank unless the owner really never changes. Otherwise you are pre-loading the same person’s workload on every project.
- Review quarterly. Run through your templates every few months and cut what nobody uses. Since edits never touch live projects, cleaning up carries no risk.
Start with one template
Pick the workflow where your team’s answers diverge most. Onboarding, retainer cycles, launches, whichever one gets rebuilt slightly differently every time. Build it once, fill in the estimated hours, and use it on the next project that lands.
From then on, the version in the template is the version everyone runs. That is the part that compounds.
Frequently asked questions
Where do I find project templates in OneSuite?
Three ways: from the Create Project drawer under “Use a project template for quick start,” from Customize in the top right of the Projects page, or by opening the All Templates page and filtering by type or category.
Does editing a template change projects I already created from it?
No. Templates are copied when you create a project, not linked to it. Edits only affect projects you create afterwards.
What exactly gets copied when I use a template?
Sections, tasks, subtasks, descriptions, priorities, labels, estimated hours, attachments, links, and custom fields.
Do template tasks get scheduled automatically?
No. Templates store estimated hours per task rather than dates. The start and due date you set at project creation define the project’s timeline, and you schedule individual tasks inside the project.
Can I use custom fields in a template?
Yes. Custom fields apply to your template’s tasks and come in nine types across Basic, Selection, and Advanced groups: Text, Number, True / False, Date and Time, Select, Multi-select, Rating, Currency, and Link.
What views can I build a template in?
Kanban and List. Switch between them freely while building.
Can I see what is inside a template before I use it?
Yes. Click any card in the library to open a drawer showing every section, task, and subtask along with priorities, labels, and estimated hours.
Start exploring OneSuite today
No credit card is required